Navigation Tree

The Navigation Tree is a tree structure of the project containing all the documents.  It helps the user find documents and also the software features in one single place. 

It allows the user to organize all the documents into different folders, rename them, generate web pages, check system tags, or system function libraries.

The basic structure of the Navigation Tree contains the following nodes:

Tags Document

The tags document centralizes all the tags available in the application.  It can be system tags which are available for all the projects or application tags created by the user.

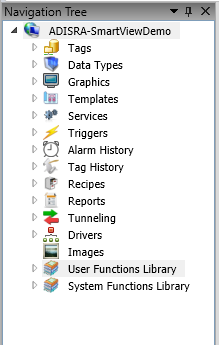
By default, all the projects contain two documents. 

  • System Tags:
         
    This document contains internal tags that can be used anywhere in the application.  These tags don’t count in the total tags count of the application.
  • Tags:
          This is an empty document that can be used as any other Tag’s document.

To create a new Tag Document, follow the steps below:

1.   Create a new Tag Document by right-clicking on the Tags folder or at any folder you want to create the document.  You can also use the pre-created Tags document.

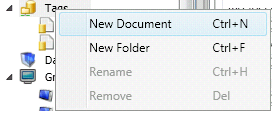
2.   Manage the Tags as desired:
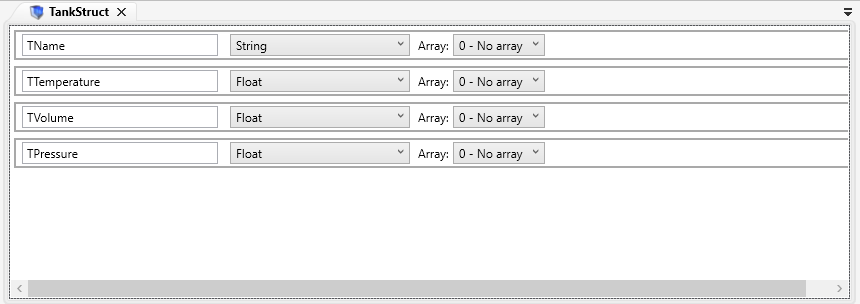
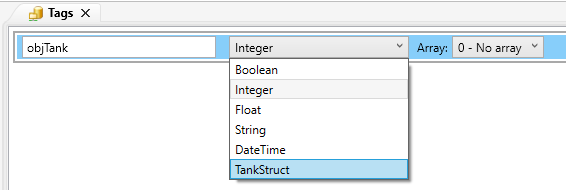
  • Insert Tag:
          A new tag will be created inside the opened document.
  • Remove Tag
          The selected tag will be removed from the opened document.
  • Import Tag
          Allows importing a csv file containing multiple tags to the opened document.
  • Export Tag
          Allows exporting the tags from the opened document into a csv file

Data Type Document

The Data Type consists in multiple tags that are grouped into the same type and it is meaningful to keep them together.

The basic tag types are:

  • Integer
  • Float
  • String
  • DateTime
  • Boolean

All Data Types created will be available as a new “Type” in the Tags document.

In this Document, the user can Insert Tag, Remove Tag, Import Tag and Export Tag.

Example:

In this next example let’s create a structure to represent a Tank and associate a tag to it.

  1. Open the Navigation Tree.
  2. Right-click the Data Types folder and insert a new document. At this point, the user can also create a folder and the document under it.
  3. As soon as the new document opens, click “Insert Tag”.
  1. Let’s configure the Name (string), Temperature (float), Volume (float) and Pressure (float)
  2. Save the document as “TankStruct”

So far, we have a structure called TankStruct with the 4 members:  Name, Temperature, Volume and Pressure.

Now let’s associate a tag to this new structure. Without the tag, the TankStruct cannot be used.

  1. Go to the Tags document, you want to add the TankStruct tag.
  2. Insert a new tag, name it as objTank and configure its type as the TankStruct just created.

This means there is actually 4 new tags in the application and they can be used as below:

  • objTank.Name
  • objTank.Temperature
  • objTank.Volume
  • objTank.Pressure

This new objTank of type TankStruct can also be used as an array (static or dynamic).  If you choose an array of dimension 1 and 10 positions, the syntax will be as follow:

  • objTank[0].Name
  • objTank[0].Temperature
  • objTank[0].Volume
  • objTank[0].Pressure

  • objTank[9].Name
  • objTank[9].Temperature
  • objTank[9].Volume
  • objTank[9].Pressure

Graphics Document

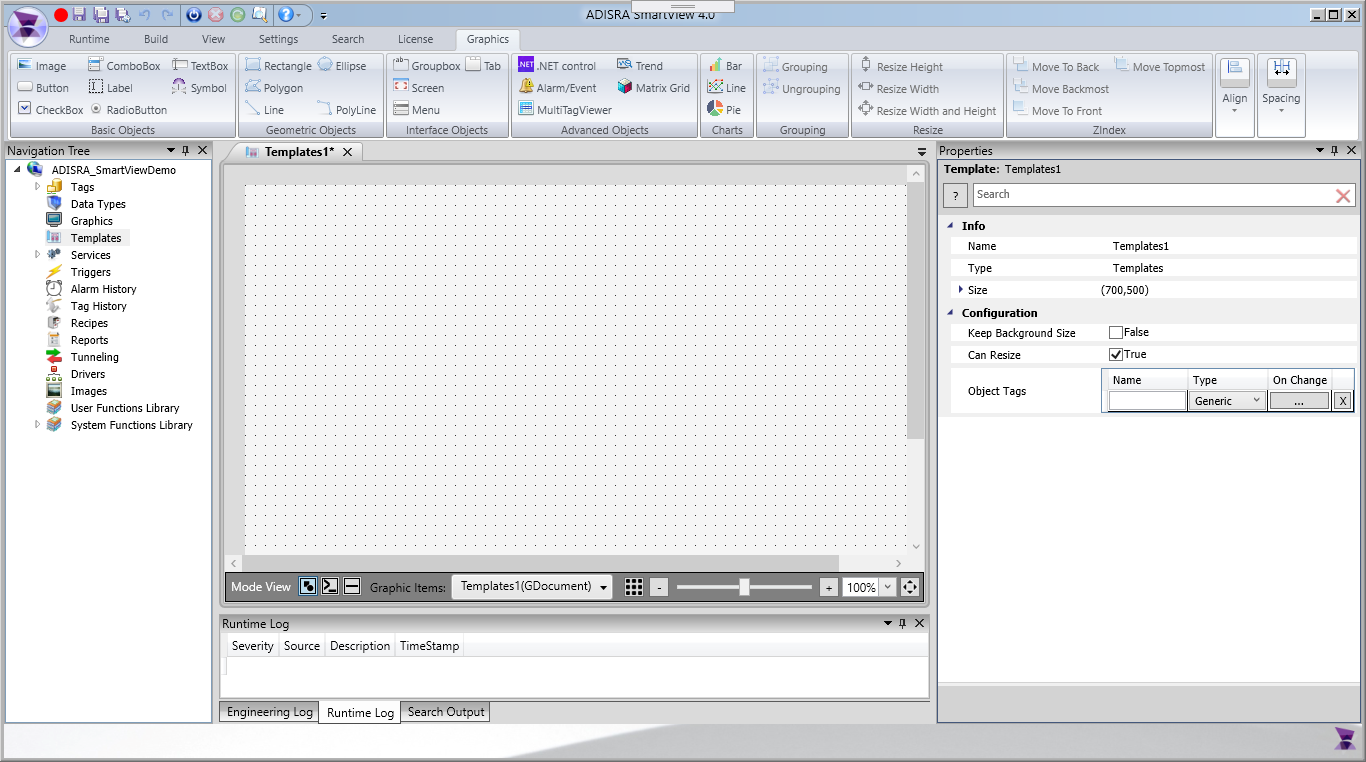
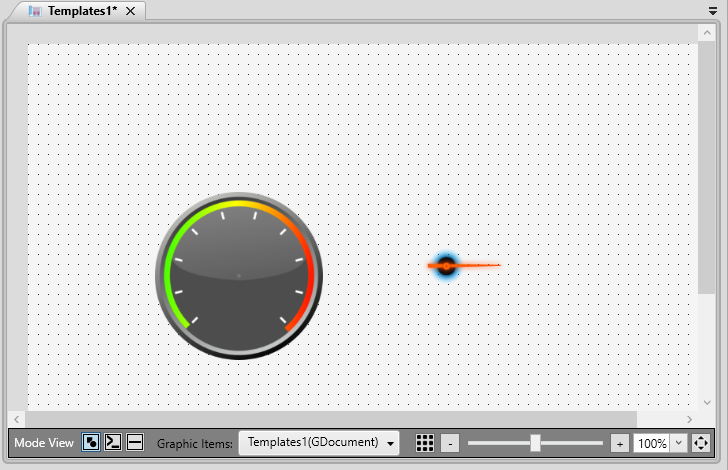
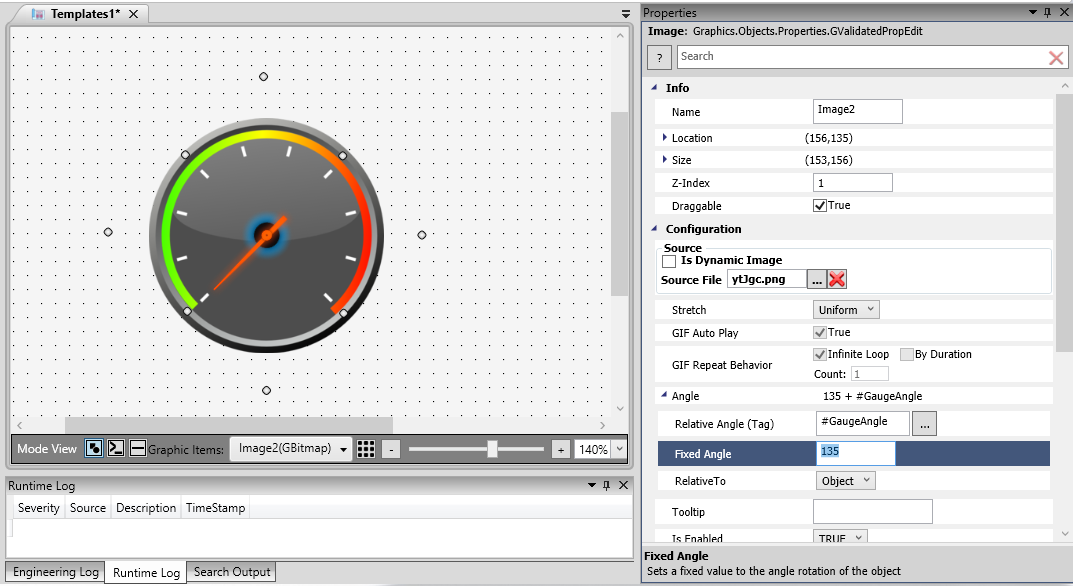
The Graphic Document is in fact a screen. It is not only the document used to design the interface but it actually shows a preview of the page since it reflects the configuration of the objects.

Graphic Tools and Objects:

  • Basic Objects
          
  • Geometric Objects
          
  • Interface Objects
          
  • Advanced Objects
          
  • Charts
          
  • Grouping
          
  • Resize
          
  • ZIndex
          
  • Align
          
  • Spacing
          

Templates Document

Users can create an object that can be used in any graphics of the project.

A Template document is almost identical to the Graphics document.

Properties:

  • Size:  Configures the size of the Template Document (Width and Height).
  • Keep Background Size:  Configures whether the background of the document will be included in the instantiated objects or not.
  • Can Resize:  Configures whether the object can be resized in Graphics documents or not.
  • Object Tags:  Defines a variable which links a tag between Objects.
  • On Change:  Configures a script that will be executed every time the specified Object Tag changes its value.  The button color changes in some cases:
- If there is no script
- If there is no error in the script
- If there is error in the script

Let’s see the example below that shows the functionality of a Template:

Example:

In this example, we will create a gauge that can be used in any graphic.

In the Template Document properties Grid, go to the Object Tags and create “GaugeAngle” type Integer, like the image below:

Create 2 images, 1 gauge and the other a pointer.

Left click the pointer image, click to show center marker and adjust it to be in the axis of rotation.

Align the pointer image with the center of the gauge.

Rotate the pointer manually, and in the properties grid of the pointer image set the Relative Angle (Tag) to “#GaugeAngle” and last, save the document with the name “Gauge”.

Please check the Templates documentatiion under the Hot Topics for further information

Service Document

The Service Document allows the user to create customized scripts using C# programming language.  They can be enabled or disabled during Runtime, they can be enabled depending on a tag value or an expressioin or they can execute everytime a tag changes value.

There is a special Service called Startup which is the first thing executed when the application starts, although it is possible to call it explicitly at any time too.  It can be used to initialize the Tags of the application.


Trigger Document

The Trigger Document is used to configure Triggers for the application.

A Trigger, similar to Services, will execute a C# Script depending on the users preference.  It can be a scheduled execution by date, or by interval, or a conditioned execution, such as a condition or a tag trigger.

To create a new Trigger, right-click on “Triggers” within the Navigation Tree and click “New Document”.

After creating the document, new options will appear in the Ribbon which allow the user to Insert Trigger, Remove Trigger, Import Trigger or Export current trigger.

Alarm History Document

Alarms and Events functionality is available for all modern SCADA systems.  They help to detect and identify a potentially hazardous or costly situations.

The Alarm document allows the user to configure tags and the type of alarms that will be saved in a text file or in a database and will be displayed by the Alarm object.  You will only configure this Alarm document in case you want to store the alarm’s history.  If you are working with online Alarm, there is no need for this configuration.

Each configured tag will generate a text file that will contain some information about the tag when it was alarmed, such as the tag name, alarm type, date and time, etc.

If the alarms will be stored in the Database, ADISRA SmartView will be responsible for creating the database table and inserting data.

TagHistory Document

The Tag History Document generates a file with the values of the specified Tags every day in a fixed path (which is the project path\History) or in a configured Database.  It is possible to save them on disk as long as desired (one day at least), thereby creating a Tag History document.

There are 3 different ways to save the values:

  • Time Frequency:  Saves the value of the tags in the document on a time frequency chosen by the user, for example, every 30 seconds.
  • On Tag Change:  Saves the value of the tags in the document if its value changes more than a specific DeadBand.
  • Trigger:  Saves the value of the tags in the document if the value of the tag configured in the trigger field changes.

It is possible to configure whether the history will be always enabled, always disabled, or enabled/disabled depending of a condition.

Recipe Documents

Recipes are documents that contain tags that will have their values saved in a specified path and file.  However, to save the file, the user will have to trigger an event at the desired moment.  The values of the tags can also be loaded during the execution of the application by triggering an event.

Recipe Document tab:

Report Document

The Report Document will create the template of a report file that will be generated every time the configured tag is triggered or if the SVReport system function library is executed.  It is possible to print the report, if necessary.

The user will be able to create reports with these extensions: “.rtf“, “.txt“, “.doc“, “.docx“, “.pdf“, “.html“, “.csv” and “.xps“.

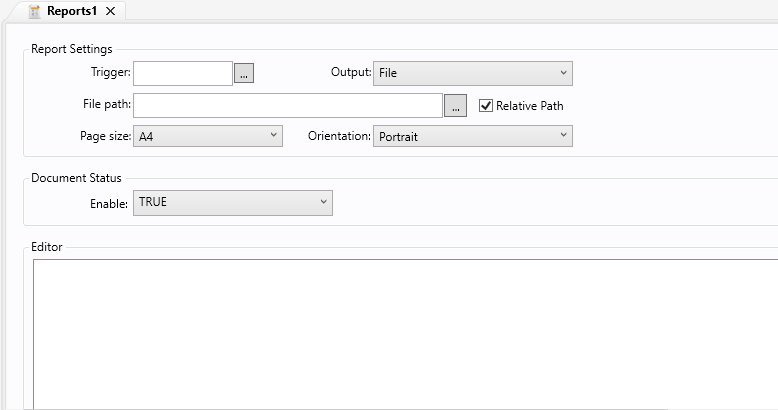
The Report Document has objects and text formatting options as shown in the image below

It also allows adding tags to the report using the @ sign. The report will use the value of the tag at the time the report is generated.

Tunneling Document

The Tunneling Document allows synchronizing tags in different directions.  It is a simple functionality that may avoid creating a service or a trigger but has the same result. 

A tunnel can link tags in different OPC Client Documents, Database Documents, or just tags in the project.

While configuring the document, the user can configure not only the tags on the left/right side but also the flow direction.  The possible entries for the flow direction selection box is bidirectional, left-to-right, or right-to-left.

If it is bidirectional, whenever a tag changes value, the linked tag configured will also receive the same value.  It is also possible to apply an expression to the target tag field.

Driver Document

The Driver Document adds communication to the project.  Depending on the driver added, the interface may change slightly.

It is possible to insert multiple documents for the same driver and it is important to achieve better performance.  Each driver document represents a new thread in the Runtime executable, so to achieve better performance, try to group tags that need similar update rates.  It is a good architecture not to make the ADISRA SmartView read all the tags in a low update rate if not necessary. 

Compatible drivers:

  • Allen-Bradley
  • Bacnet
  • ModBus TCP
  • MQTT
  • Siemens
  • SNMP
  • OPC UA Client Document
  • OPC HDA Client Document
  • OPC DA Document
  • Database
Images Document

The Images Document contains all the images used in the application.

Images may be inserted or removed from the document.  An alternative is to copy and paste an image to the Images folder directly using the Windows Explorer and it will be available automatically in the project.

Tip:  Use an image editor program such as GIMP to add transparency to the image. Then only the relevant parts of the image will be displayed.

User Function Library Document

Users can create functions in customized libraries which can be exported and imported to any project created in ADISRA SmartView.

In the User Function Libraries, the user will be able to create functions used in the application.  For example, is to create a customized math library to help in the execution of the application.

The libraries are made using the C# programming language and it CANNOT contain any tag in it.  If a tag value is needed in the function, then the user will need to pass the tag as parameters of the function or return a value.

Additionally, there is a System Function Library that allows you to select a tag value or to change its value.  Please check SVTags function library. 

To use a User Function Library, please use the format in the example below:

LibraryName.FunctionName(pameter1, parameter2, …);

Example:

In this example, the tag “TagFunction” will store the result from the function “Sum”, that will sum 2 values passed in the parameter, created in the “CustomizedMathLibrary”.


  • In the “Queries” area click the “New” button, name the query and click “OK”.

  • In the “Table” combo box, select the configured table from the database.  In the “Key Field”, “Value Field”, “Time Stamp Field” and “Quality Field” boxes, select the columns configured from the table previously selected.

  • Inside the “Tags List” area, double click on the cell in the Tag column (as shown by the red box in the image below), then click the “…” button; this action will open the “TagBrowser” window for the user to choose a tag.

  • Inside the Tags List area, double click on the cell in the Item column (as shown by the red box in the image below), then click the “…” button; this action will open the “Database Item Browser” window for the user to choose an item from the database to be associated with the selected tag.  Select a “Query” created and a “Key” from the database table, click “OK” to save the document.

In this example, “TagFunction” will store the result from the function “Sum”, that will sum 2 values passed in the parameter (in this case one tag and one static value), created in the “CustomizedMathLibrary”.

Navigation:

The Combobox in the top right of the user function library can be used to navigate between the functions created in that document.

When you select a function in the Combobox the focus will go to the selected function.

Import/Export:

To import a library, follow the steps below:

1.   Right-Click the “User Function Library”.

2.   In the menu, select the option Import.

3.   In the new window, click the “Selected File” button.

4.   Select the desired file that will be imported.

5.   In the ComboBox, select the desired classes and functions that will be imported.

6.   Check/Uncheck the ComboBox, if desired.

7.   Click the OK button to confirm the import.

To export a library, follow the steps below:

1.   Right-Click the “User Function Library”.

2.   In the menu, select the option Export.

3.   In the new window, click the “ChangeFolder” button.

4.   Insert the desired name of the Exported file in the “File name” field.

5.   In the ComboBox, select the desired classes and functions that will be imported.

6.   Click the OK button to confirm the import.

System Function Library Document

A collection of System Libraries with functions that cannot be changed nor excluded.

The System Libraries contain predetermined functions to add features to the application. There are libraries to manipulate Events, Graphics, GroupScreen, Recipes, Security and more.

Libraries:

  • SVApplications
  • SVDBConnection
  • SVEvent
  • SVFile
  • SVGraphics
  • SVHistory
  • SVMath
  • SVRecipe
  • SVReport
  • SVSecurity
  • SVString
  • SVTags

Folder Structure

The image below shows the project’s folder structure. Each folder is created for its related documents: