How to Connect to Microsoft SQL Server
Purpose of this article
This article aims to show you how to download, install and connect Microsoft SQL Server 2017 Express to ADISRA SmartView.
Microsoft SQL Server is a relational database management system developed by Microsoft. As a database server, it is a software product with the primary function of storing and retrieving data as requested by other software applications that can run on the same computer or on another computer on a network.
There are some limitations of features available in these software as it is free software.
Maximum database size limit: 10 GB
This limit is only applied to data (logs are not considered).
Maximum limit of RAM memory used: 1 GB
This limit is for the Buffer Pool (cache) only.
Maximum CPU limit: 1 CPU. If the server has 8 quad-core processors, only 1 quad-core processor will be used.
Downloading SQL Server 2017 Express and SQL Server Management Studio (SSMS)
In order for knowledge, SQL Server 2017 Express software is responsible for running the database. SQL Server Management Studio Software is a tool for configuring, managing and administering all components in Microsoft SQL Server. The tool includes script editors and graphical tools that work with server objects and resources. For our article, we will download both software.
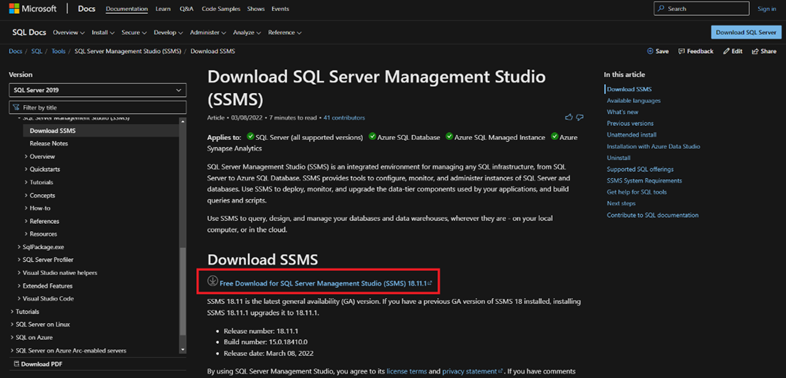
- Download SQL Server 2017 Express from the link below.
Link: Click Here
- Download SQL Server Management Studio (SSMS) from the link below.
Link: Click Here
Installing SQL Server 2017 Express
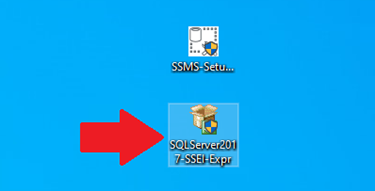
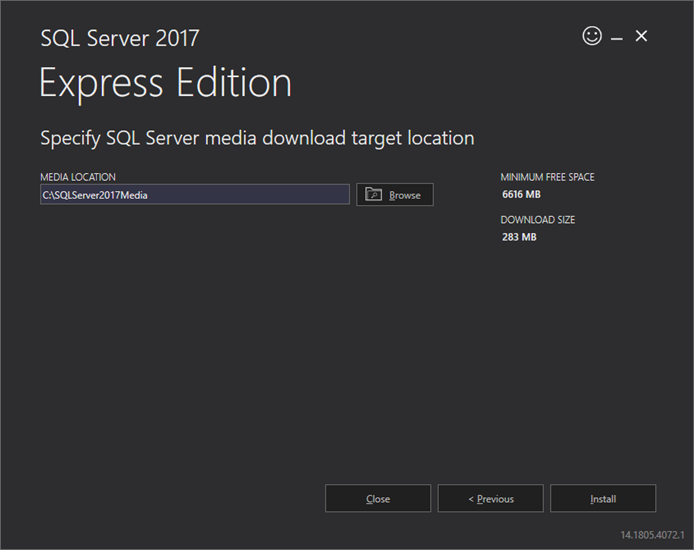
- Run SQL Server 2017 Express install.
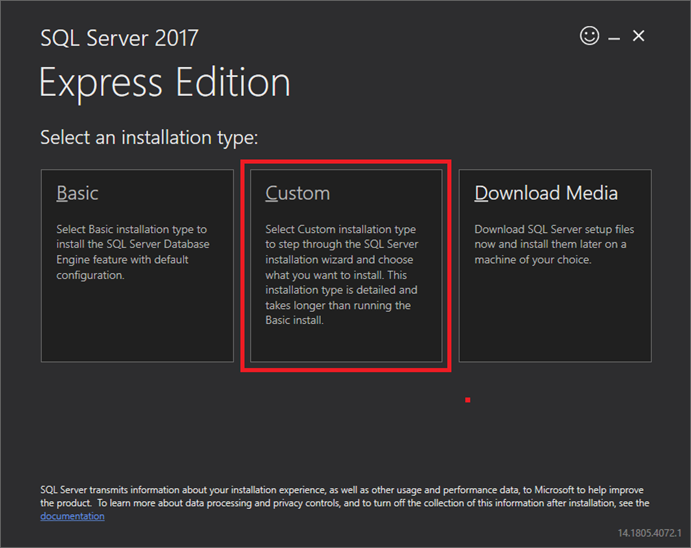
- Select the “Custom” installation type.
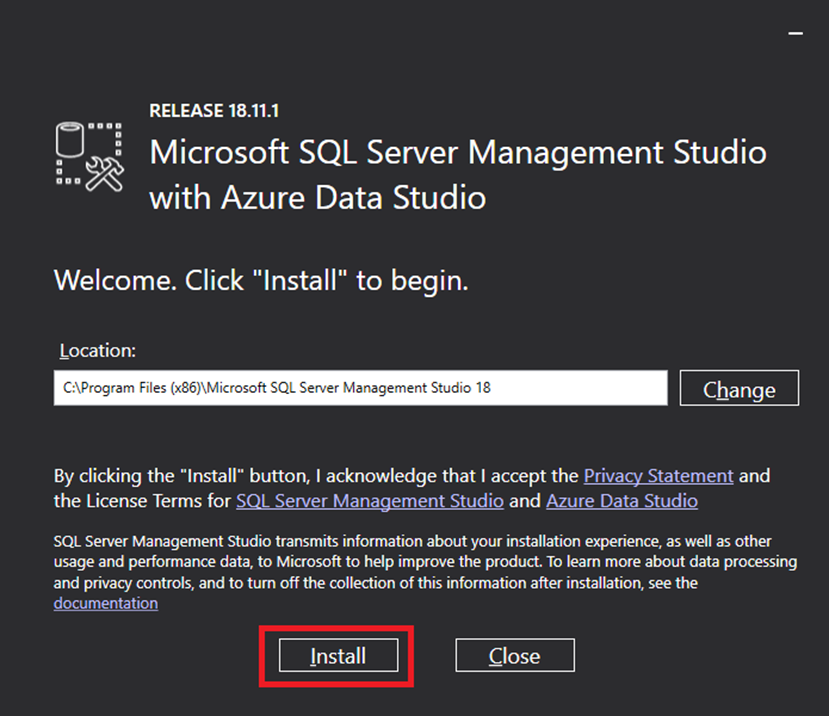
- Enter the installation path. It is advisable to keep to the suggested path. Then click on “Install”.
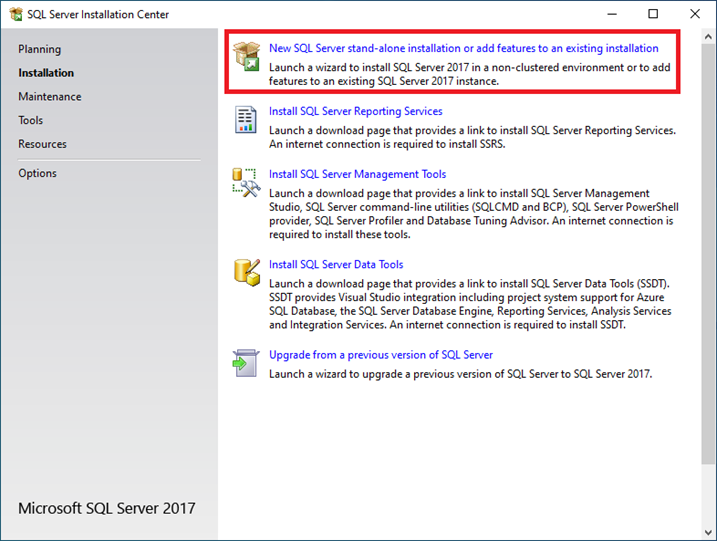
- After downloading the installation files, a window for installing SQL Server 2017 Express will open. Click on the first option “New SQL Server stand-alone installation or add features to an existing installation”.
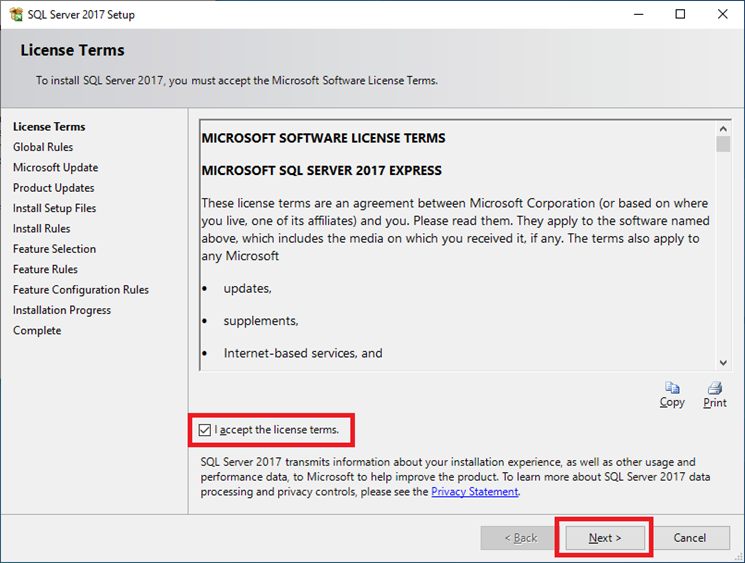
- Accept the terms and click Next.
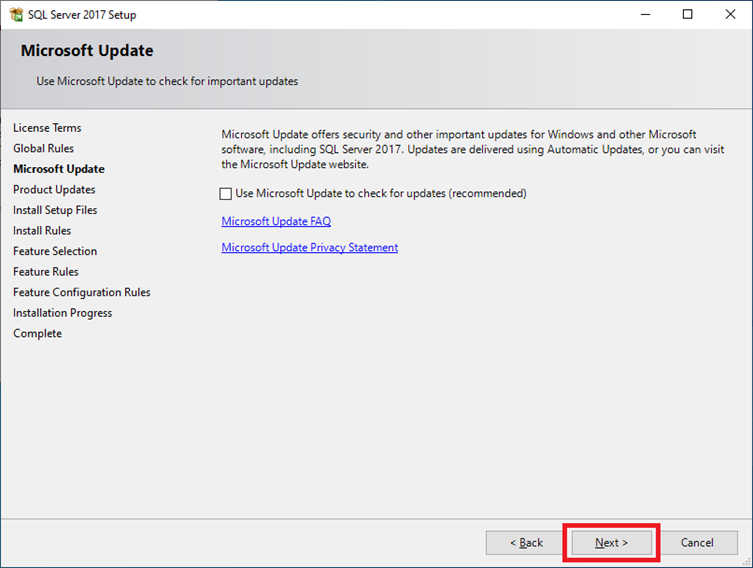
- Click Next.
- Click Next.
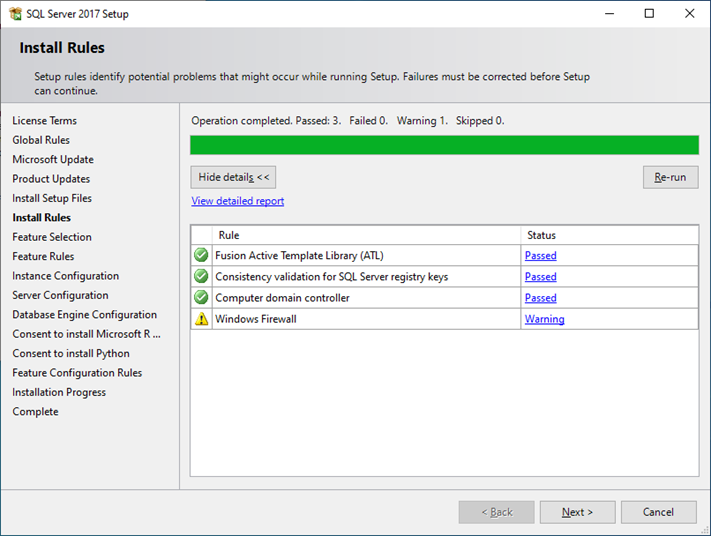
Note: The firewall warning does not compromise the installation.
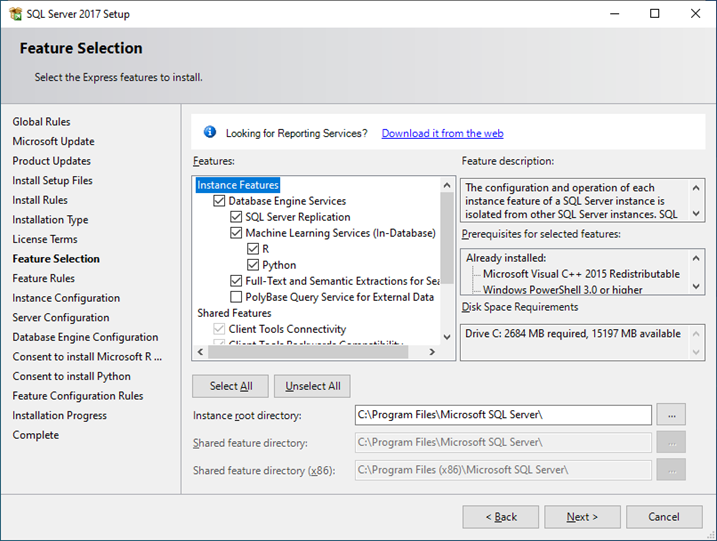
- Keep the features selected as shown in the image below. Then click Next.
- Select the “Named Instance” option.
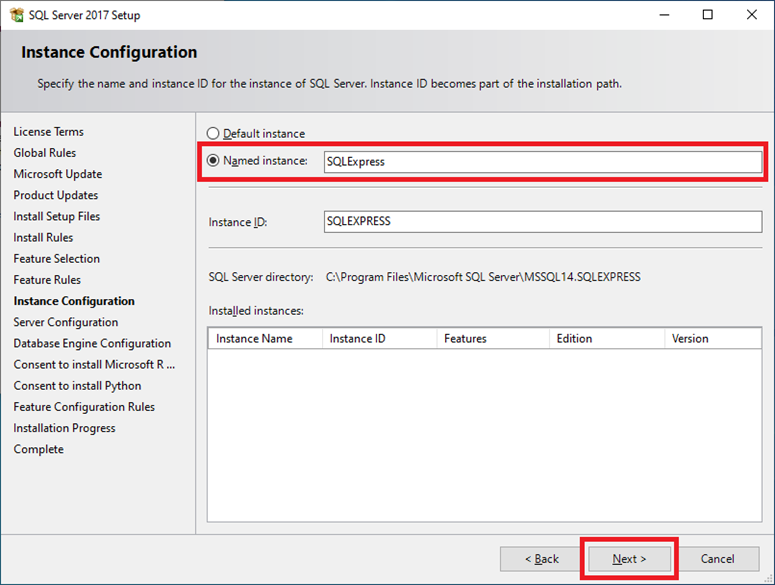
- Click Next.
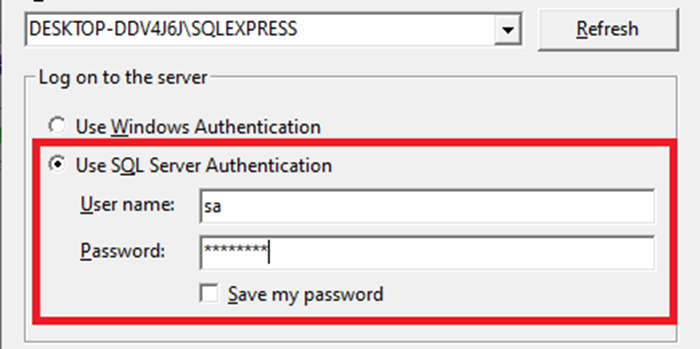
- The next step is the most important of the installation. Select the “Mixed Mode” option (SQL Server and Windows authentication). Set the initial password of the user “sa”, which is the default admin user.
Attention! This password will be used when connecting to the ADISRA SmartView.
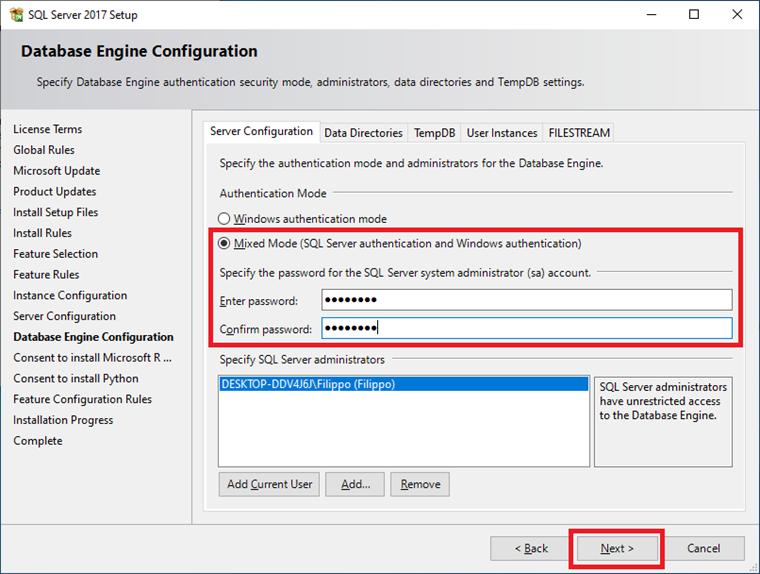
Note:If you want, you can use Windows authentication by selecting the first option “Windows Authentication mode”.
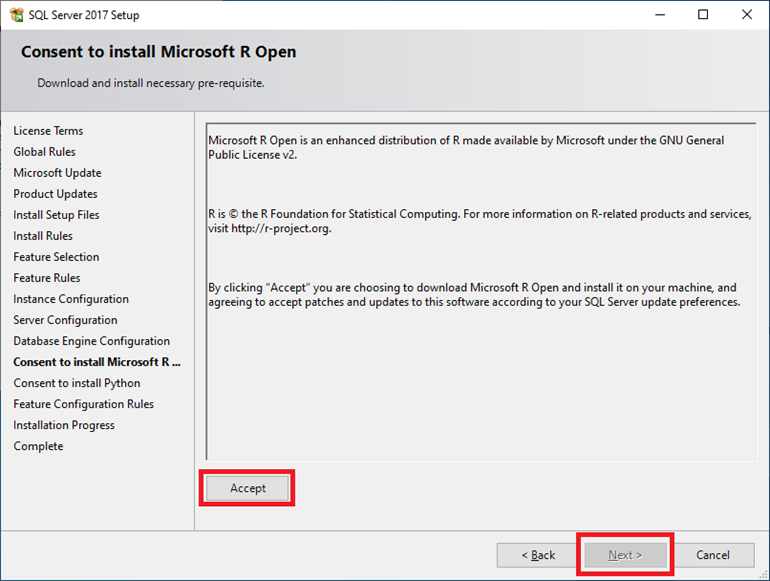
- Accept the prerequisite installation and click Next.
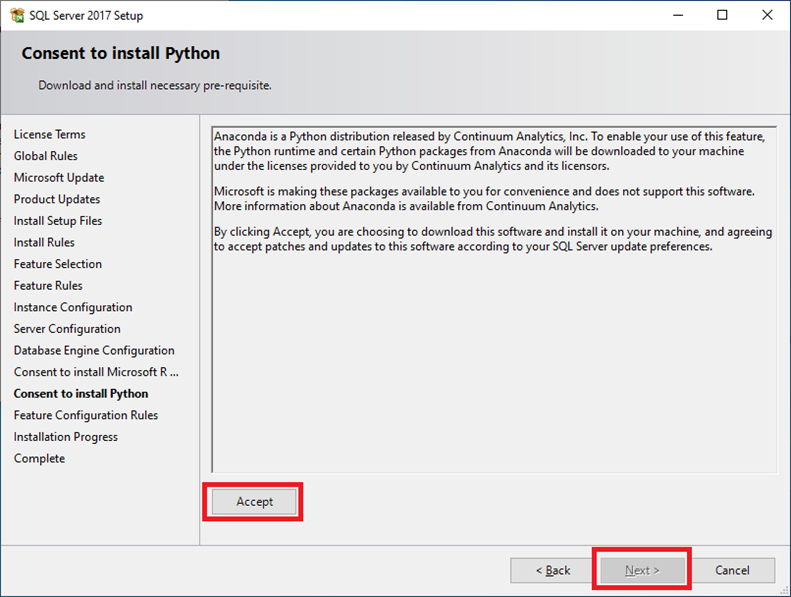
- Accept one more prerequisite installation and click Next.
- Wait for the installation to finish.
Installing SQL Server Management Studio (SSMS)
- Run the SQL Server Management (SSMS) installer.

- Set the installation path. It is advisable to stick to the suggested path. Then click Install.
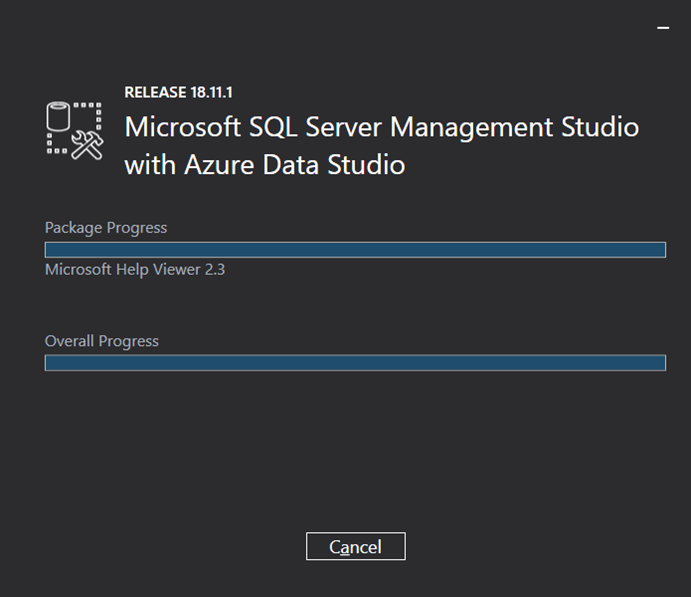
- Wait for the installation.
- After installation, restart your computer.

Creating the SQL Server Database
After installing SQL Server 2017 Express and SQL Server Management Studio, let’s create a database and then a table.
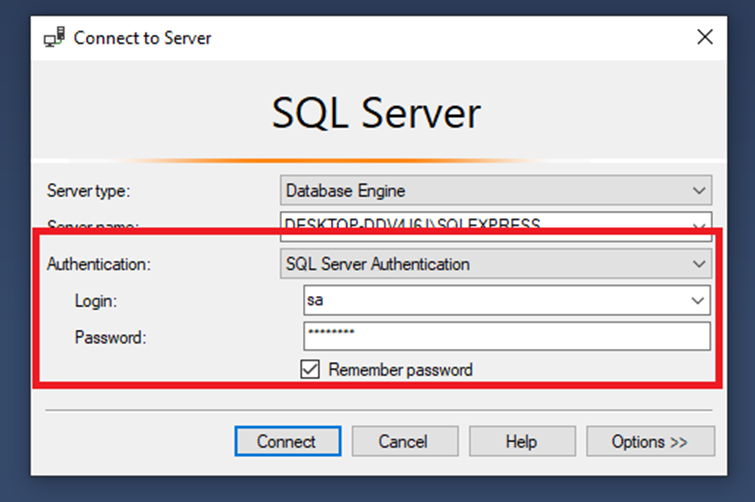
- Open the SQL Server Management Studio Software by searching the start menu. Type “SSMS” and then run it.

- In the “Authentication” field, select the “SQL Server Authentication” option. Then put the login “sa” and the same password entered at the time of installation.
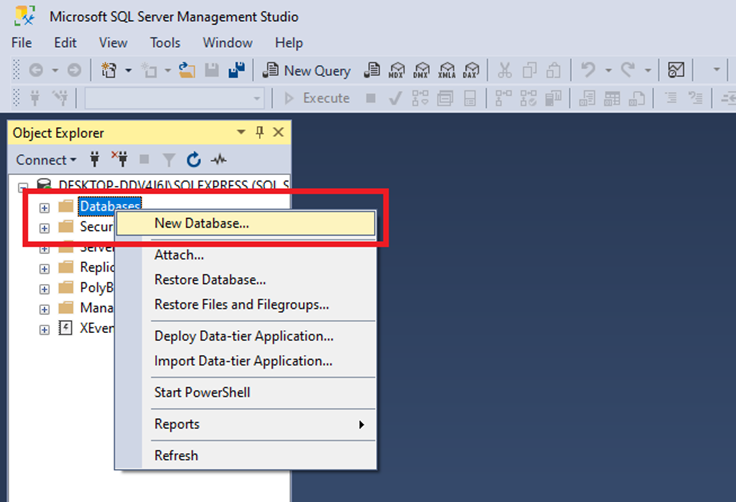
- After opening the SSMS, in the navigation tree located on the left side, right-click on the “Databases” item and then click on the “New Databases…” option.
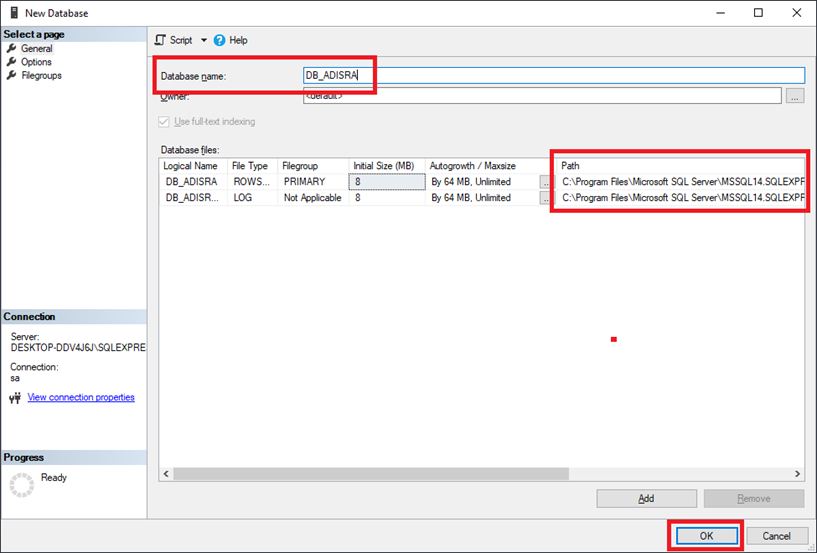
- Insert the new database name as “DB_ADISRA”. In the table below you can view and change the location where the database files will be saved. Then click OK.
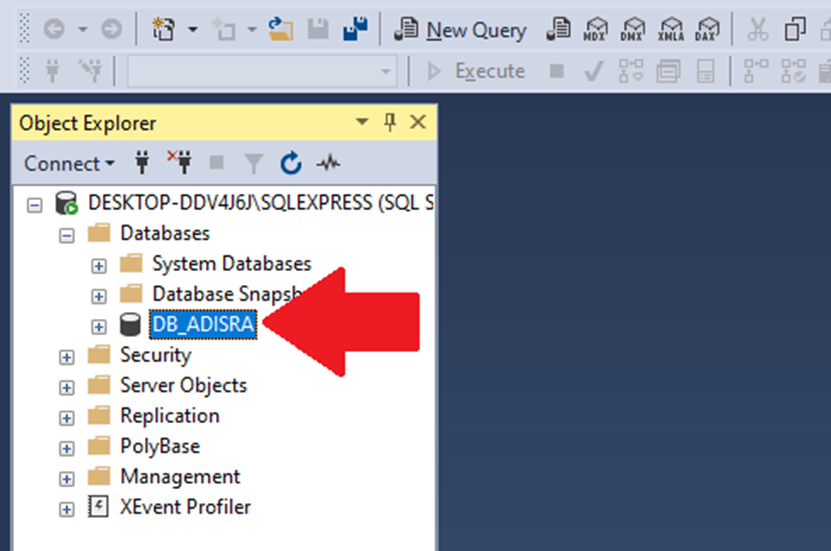
- Below the expected result.
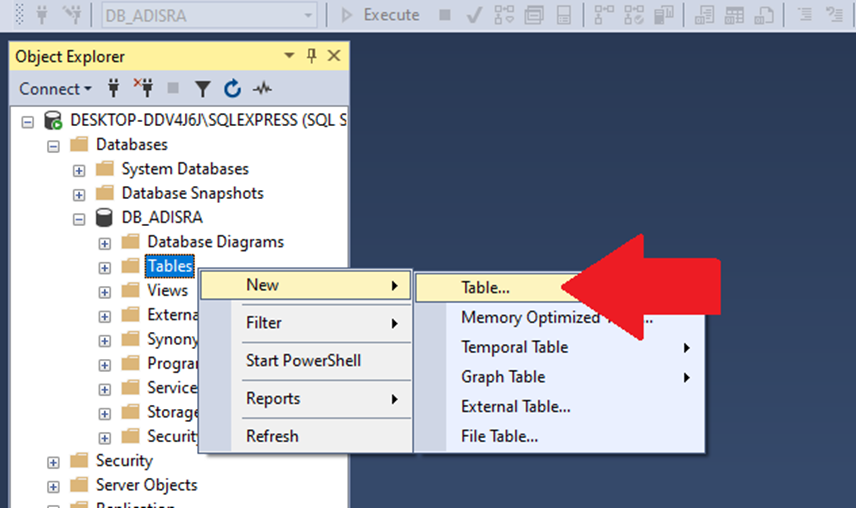
- Now, expand the new database and right-click on the item “Tables”, “New” and then on “Table…”.
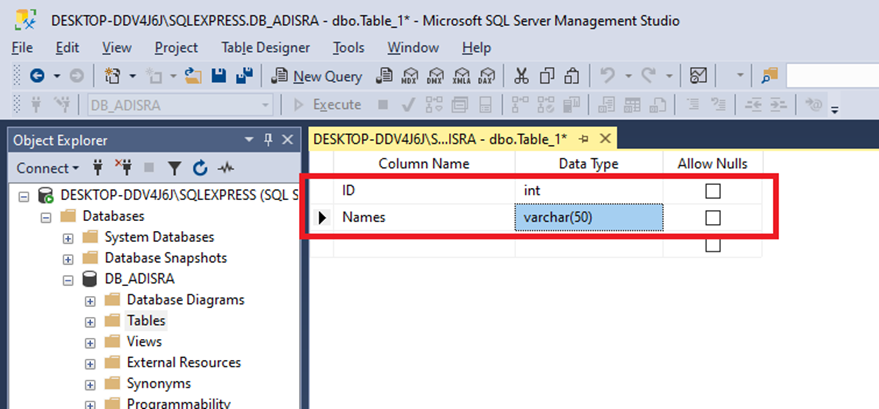
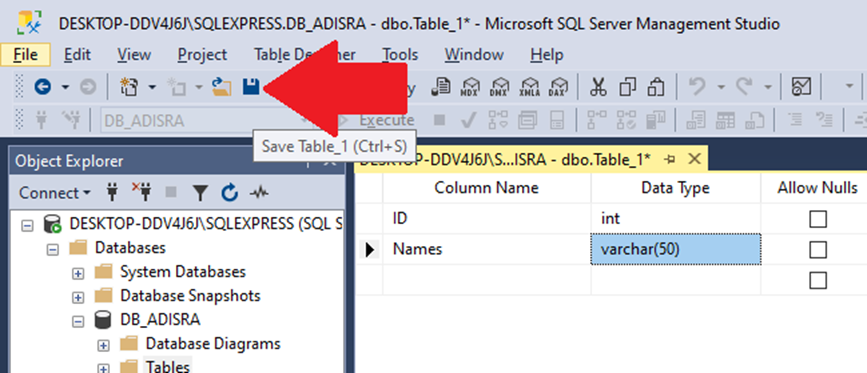
- Insert two columns. The first called “ID” and with the Data Type as “INT”. The second column called “Names” with the Data Type as “varchar(50)”.
- Then click on the save button located on the top menu.
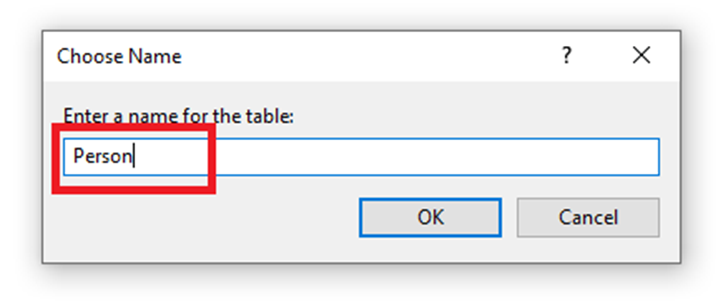
- Save the table as “Person”.
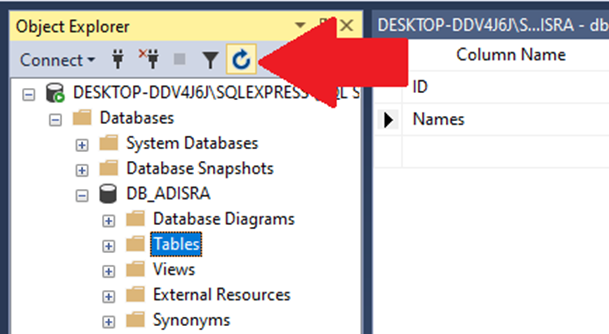
- Refresh the database by clicking the “Refresh” button.
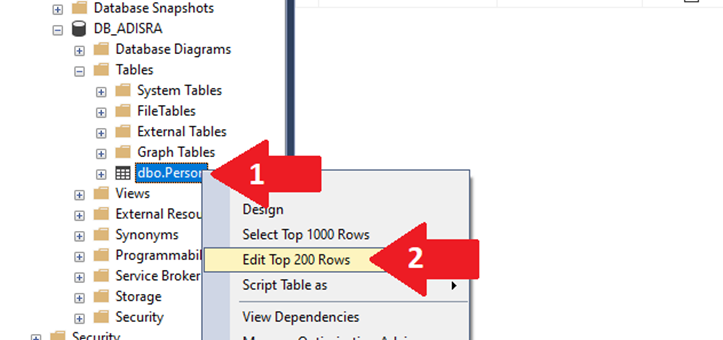
- Expand the item “Tables”, right-click on the new table “dbo.Person” and then click on the Edit top 200 Rows option.
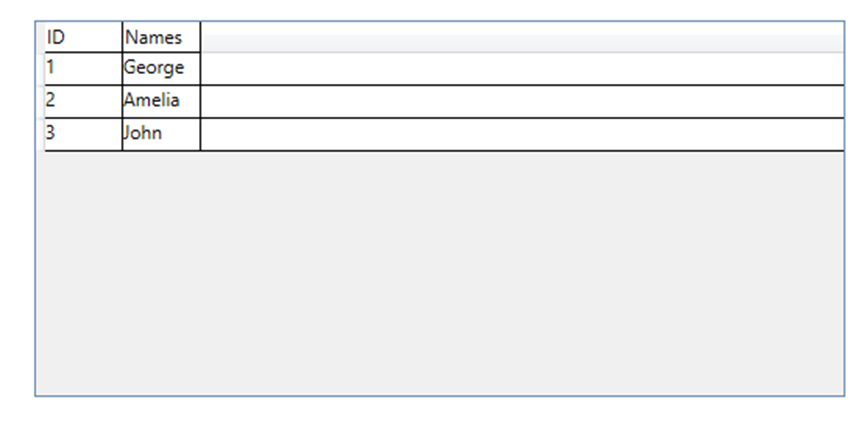
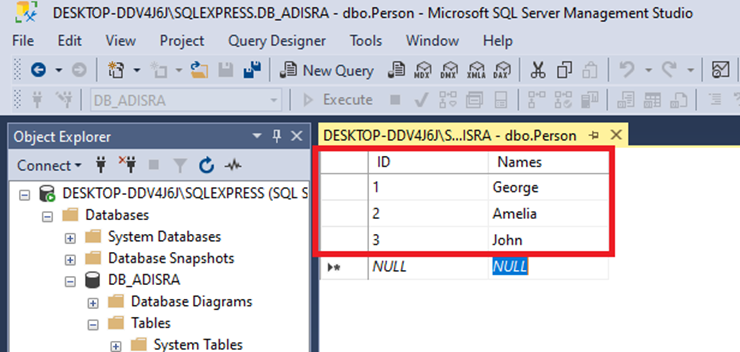
- Insert the values “1, 2 and 3” in the ID column and fill in the “Names” column with the names “George, Amelia and John” as shown in the image below. Once that’s done, keep SSMS open and follow the next steps.
Configuring ADISRA SmartView
After creating the “DB_ADISRA” database and the “Person” table with some data, we will learn how to create an ADISRA SmartView connection with the SQL Database and how to query the data in the “Person” table through the DataGrid object.
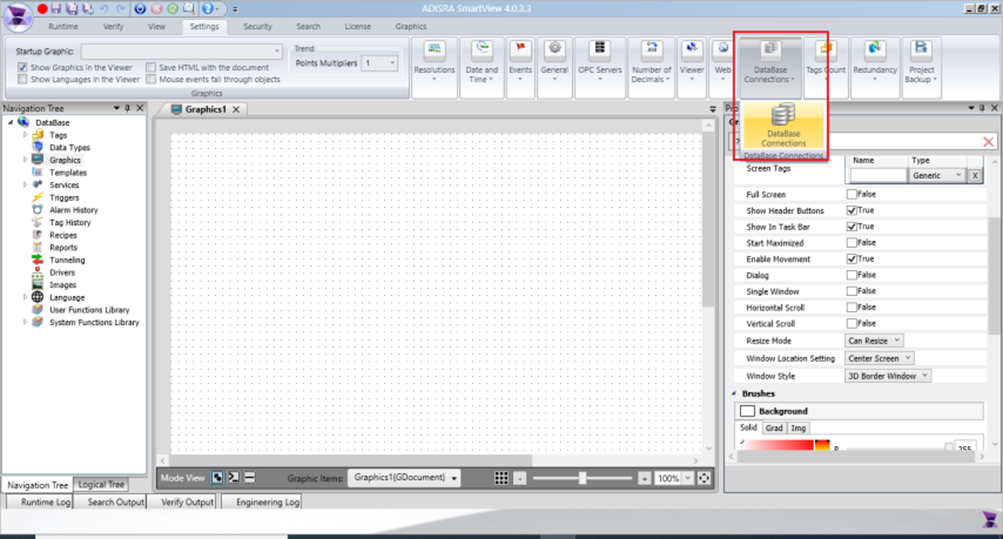
- Open ADISRA SmartView and create a new application. On the top menu, click on the “Settings” tab and then click on the “Database Connections” option.
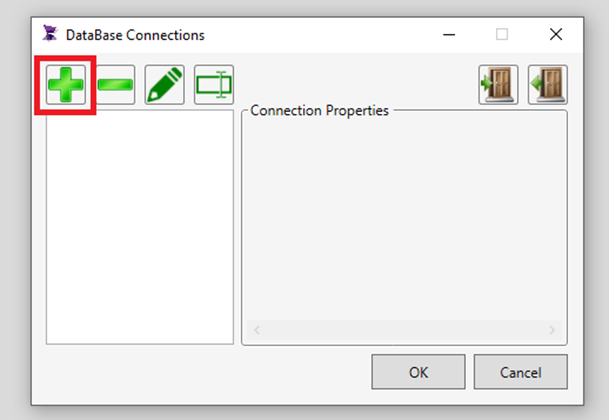
- Click the “+” button to add a new connectivity.
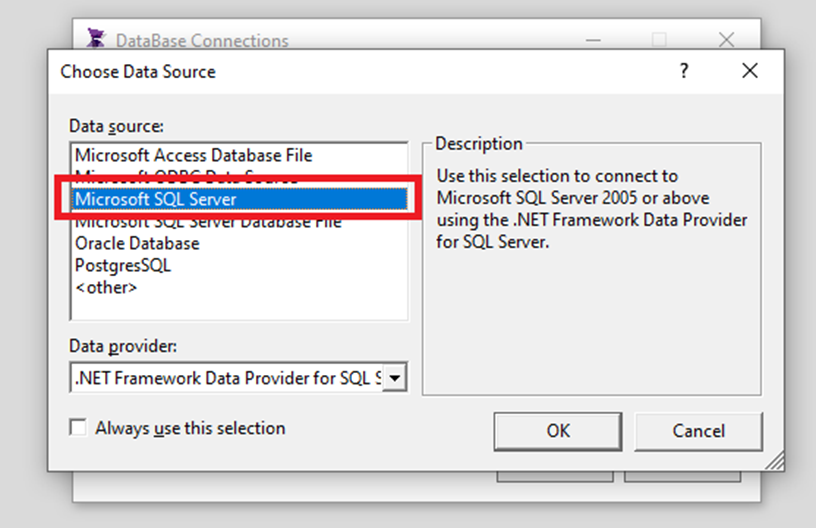
- Select the “Microsoft SQL Server” option.
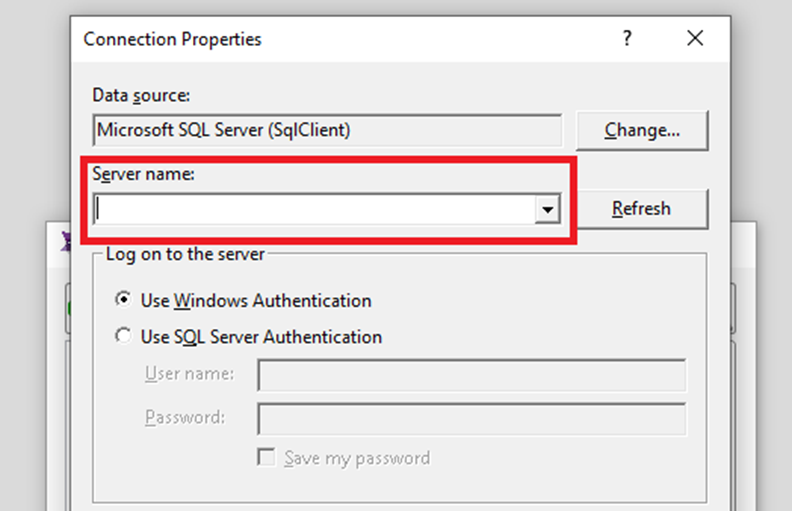
- In the “Server name:” field we will need to put the server name. To know the name of the SQL server, follow the next step.
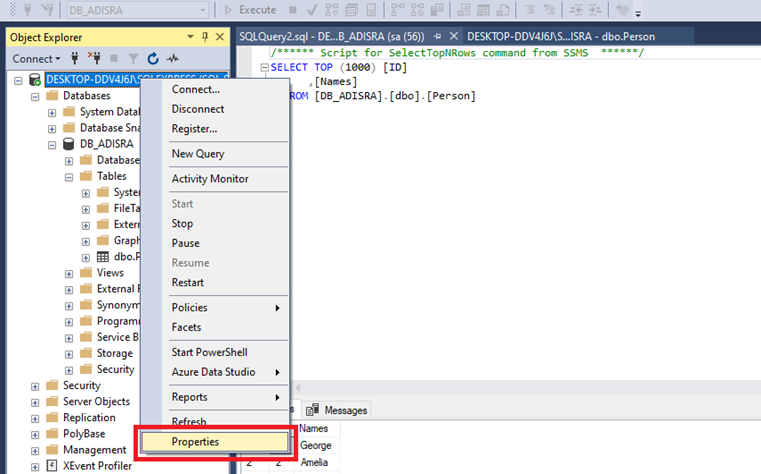
- Open SSMS, right-click on the Database located in the navigation tree as shown in the image below and click on the “Properties” option.
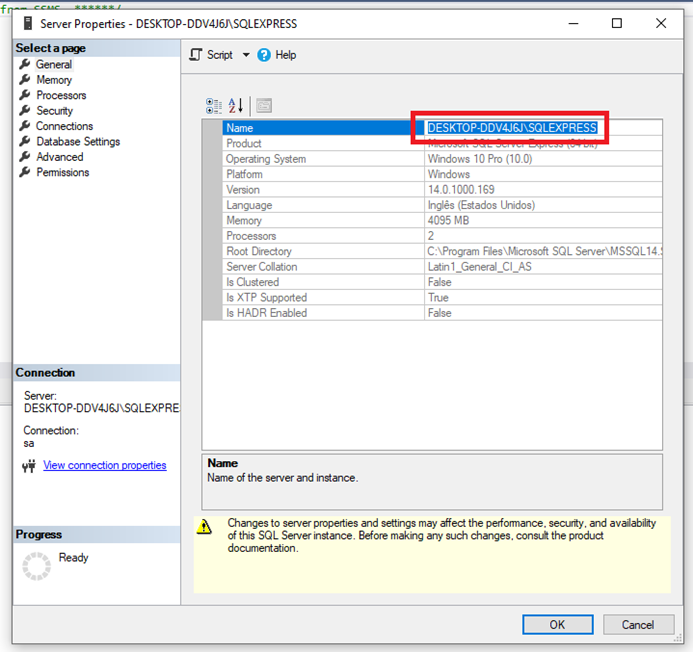
- In the first option of the table called “Name”, copy the name of the database.
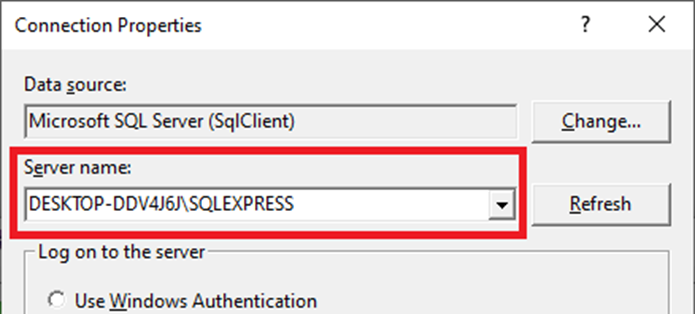
- Go back to ADISRA SmartView and paste the database name.
- Select the “user SQL Server Authentication” option and enter the login “sa”, and then the password entered when installing SQL Server.
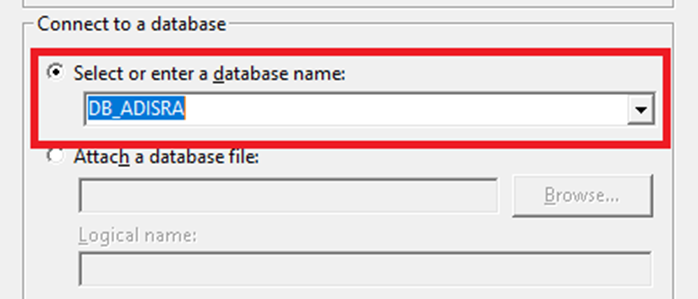
- Select the option “Select or enter a database name:” and click on the “DB_ADISRA” database.
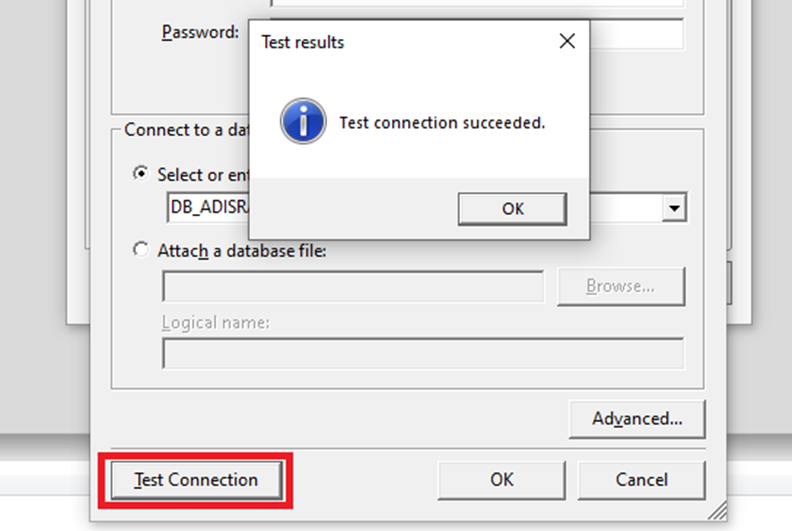
- Test communication with the database, then click OK.
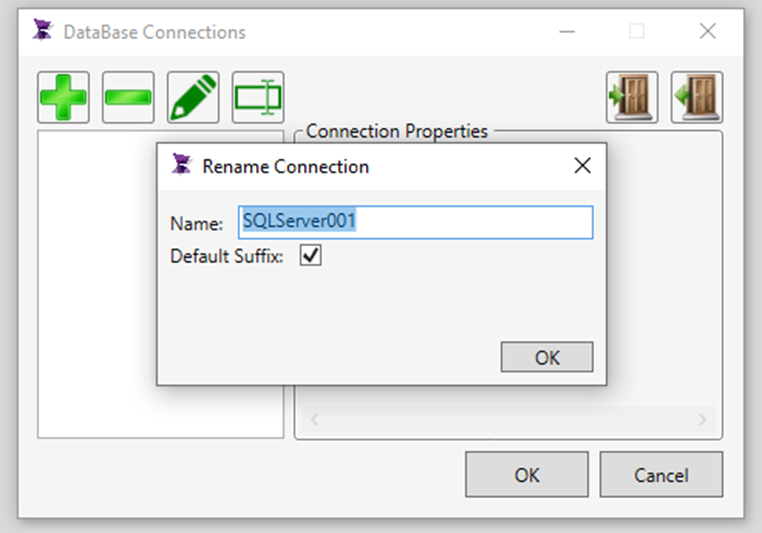
- Save the connection name as suggested.
Querying the “DB_ADISRA” database
- Create a new Graphic and insert a “Datagrid” object.
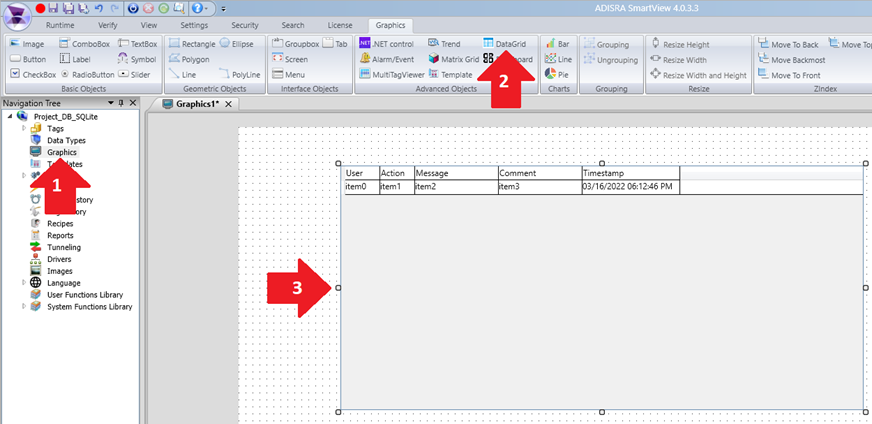
- In the property list of the datagrid object, in the “Datagrid Config” property, select the option “Table”, “SQLServer001” and “Person”.
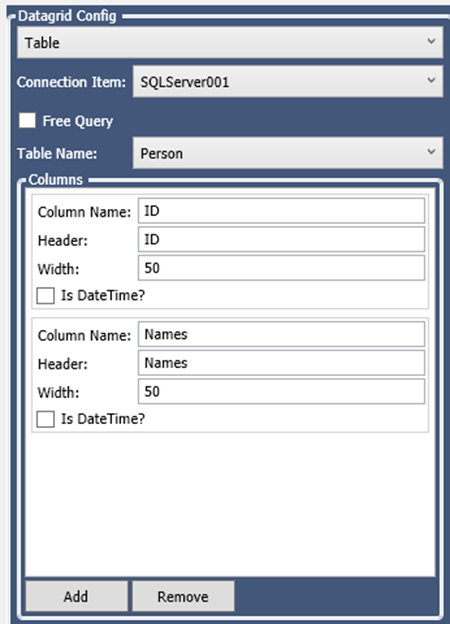
Note: When the table is selected, all columns will be shown.
- Below the expected result.
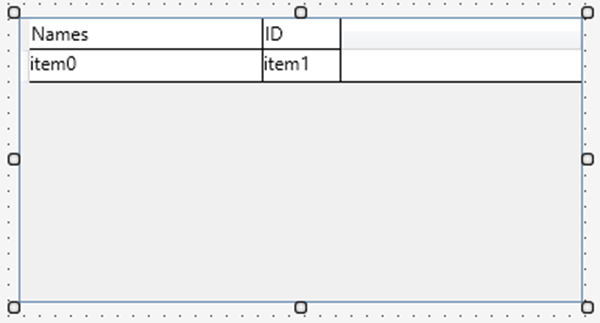
- Now, save the application and set “Graphic1” as the initial Graphic of the Runtime and then start the Runtime. Below the expected result.