How Can We Help?
How to Connect to Microsoft Access
Purpose of this article
This article aims to show you how to configure Microsoft Access and integrate with ADISRA SmartView. Below, an example table will be created.
Creating a table in Microsoft Access
Microsoft Access is a database management software (DBMS) provided in the Microsoft Office suite. It is commonly used in smaller applications for simple data storage.
- Open Microsoft Access and create a blank database as shown in the image below.

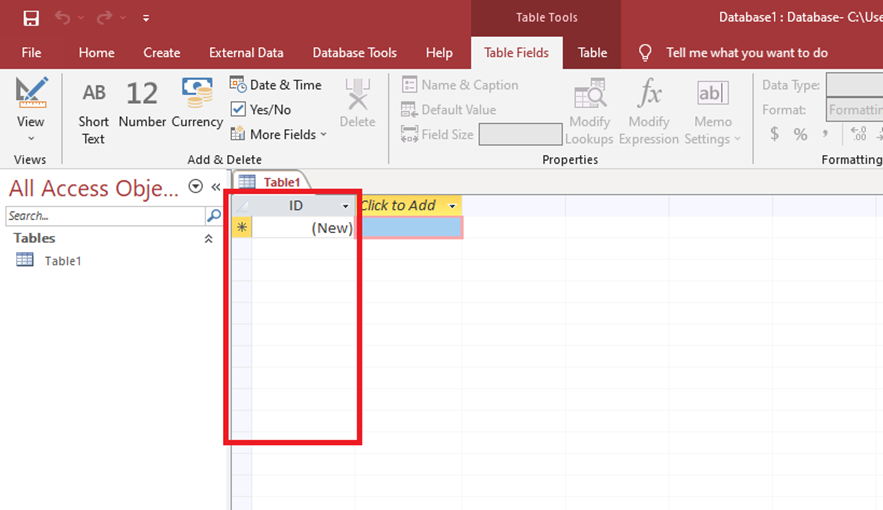
Microsoft Access will automatically create the first table with a column called “ID” as shown in the image below.
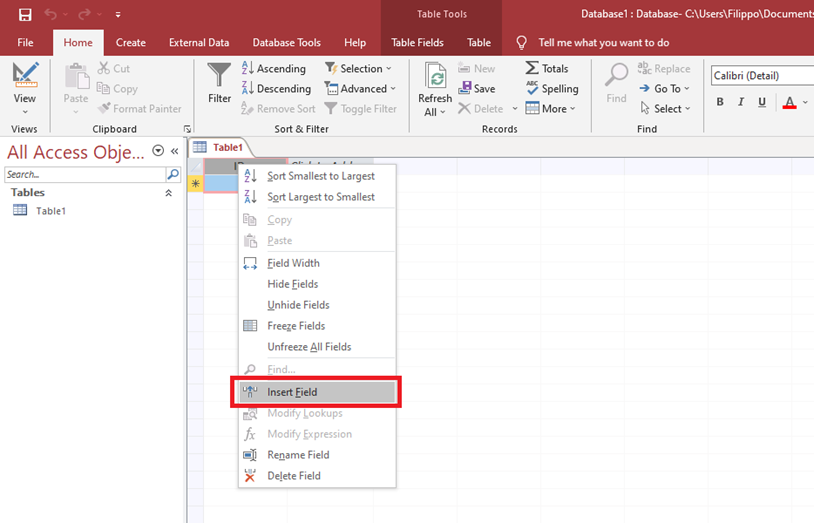
- Right-click on the “ID” column and then click on the “insert field” option.
- Right-click on the new “Field1” column and then click on the “Rename Field” option. Rename the column to “Names”.

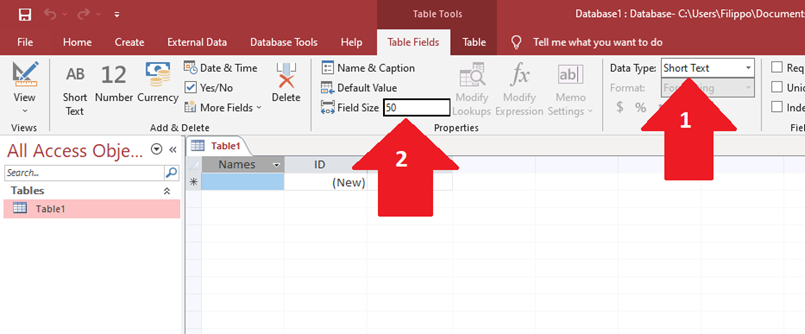
- Select the new column “Names” and in the top menu, click on the “Table Fields” tab and set the “Data Type” as Short Text, and the “Field Size” with the value 50 as shown in the image below.
- Click on the first field of the “Names” column and enter the name “George”.
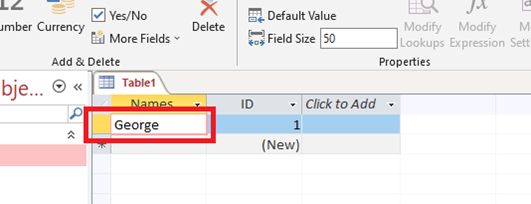
Note: The “ID” column will be automatically incremented with increasing numbers as it is an Identifier column.
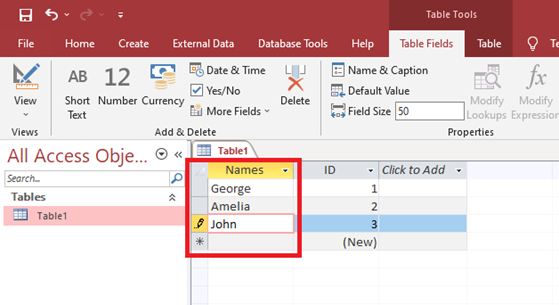
- In the “Names” column add two more names to the fields.
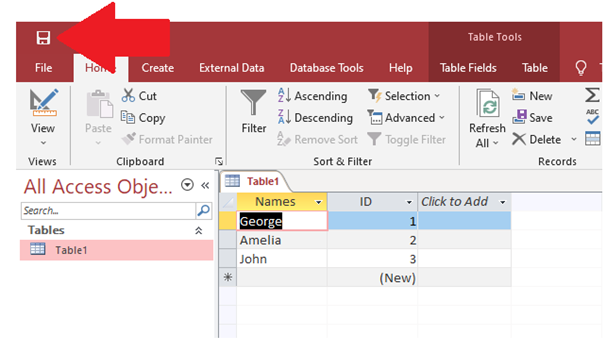
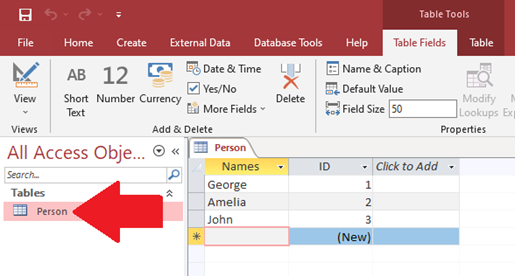
- Now, on the top menu, click on the “Save” button. Then Microsoft Access will ask for a new name for “Table1”. Save the table as “Person”.
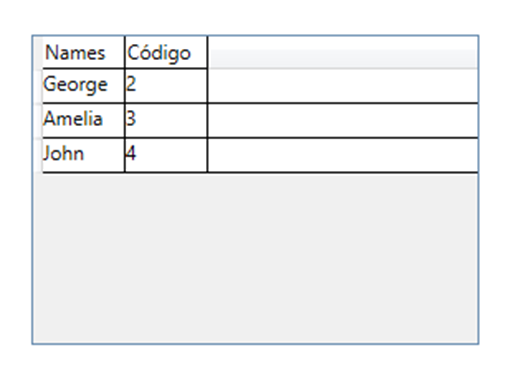
- After the action in Step 7, the expected results are below.
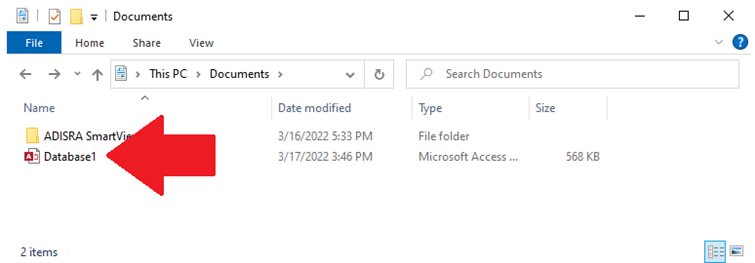
- In the screenshot below, it shows the path where the database was saved. The file has the extension “.accdb”.
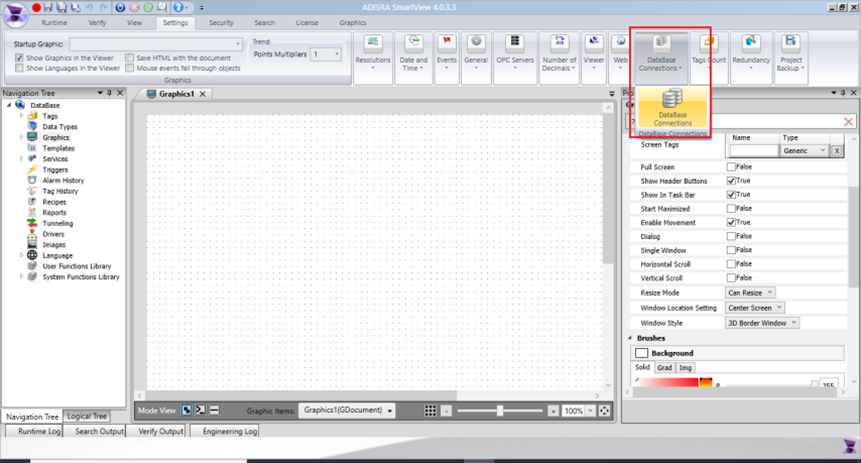
Configuring ADISRA SmartView
- Open ADISRA SmartView and create a new application. On the top menu, click on the “Settings” tab and then click on the “Database Connections” option.
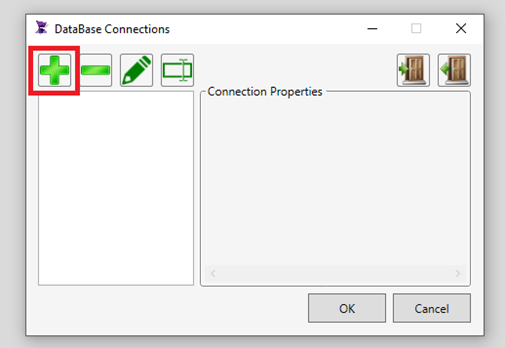
- Click the “+” button to add a new connectivity.
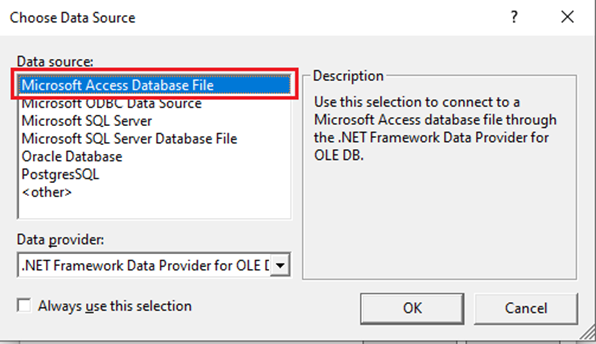
- Select “Microsoft Access Database File” as your data source, then click OK.
- In the new open window, click on “Browse…” and search for the database generated by Microsoft Access. In our example above, it was Database1.
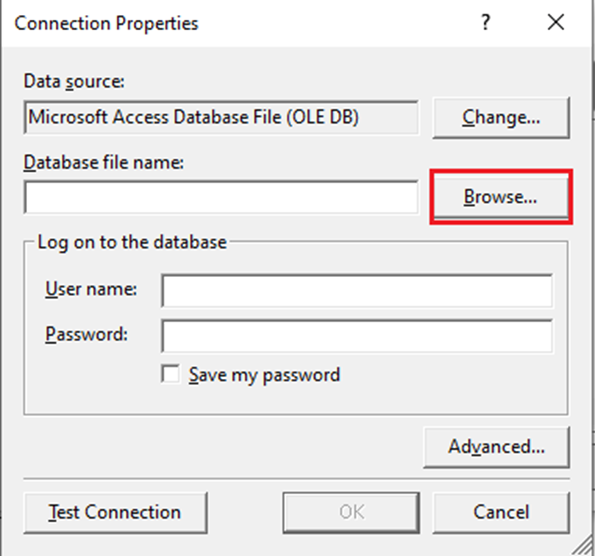
Note: It is necessary to close Microsoft Access to be able to browse in the “Database file name:” for “database1.accdb”.
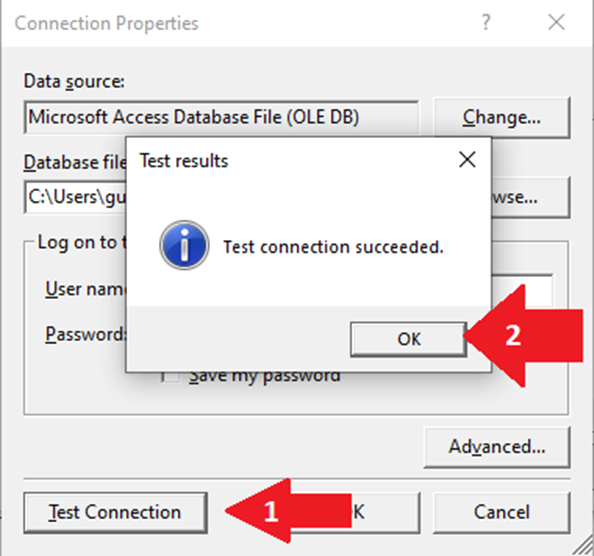
- Test the communication by clicking the “Test Connection” button. Click the OK button in the test window and after clicking OK to close the configuration window.
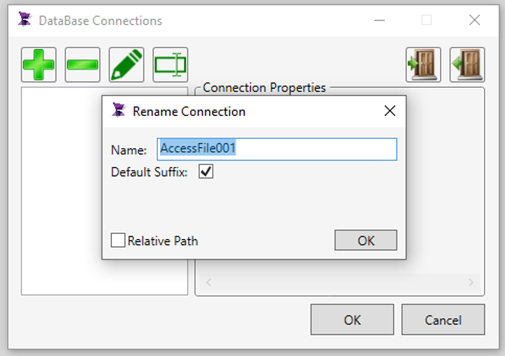
- Keep the database name as “AccessFile001” and click OK.
Querying the Database called “Database1.accdb”
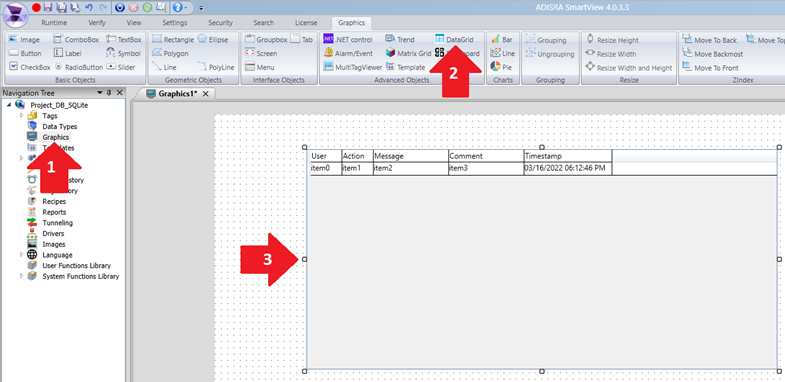
- Create a new Graphic and insert a “Datagrid” object.
- In the property list of the DataGrid object, in the “DataGrid Config” property, select the option “Table”, “AccessFile001” and “Person”.
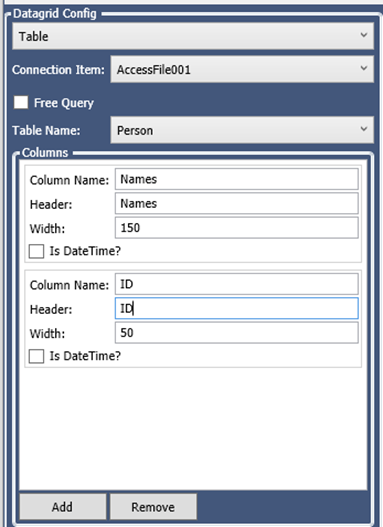
Note: When the table is selected, all columns created in Microsoft Access will appear.
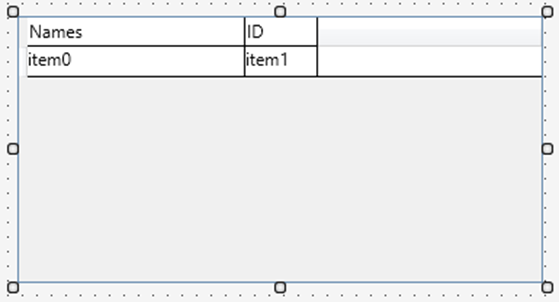
- Below the expected result.
- Save the application and set “Graphic1” as the initial Graphic for the Runtime and then start the Runtime. Below is the expected result.