How Can We Help?
Connecting to Codesys via OPC-UA Protocol
Purpose of this article
This article aims to show how to connect ADISRA SmartView to Codesys via OPC-UA Protocol. In the example that will be shown, ADISRA SmartView will be the Client and Codesys will be the Server.
1. Downloading and Installing Codesys
- Access the website (https://store.codesys.com/en/) and download the version (32bit or 64bit) of CODESYS Development System V3.
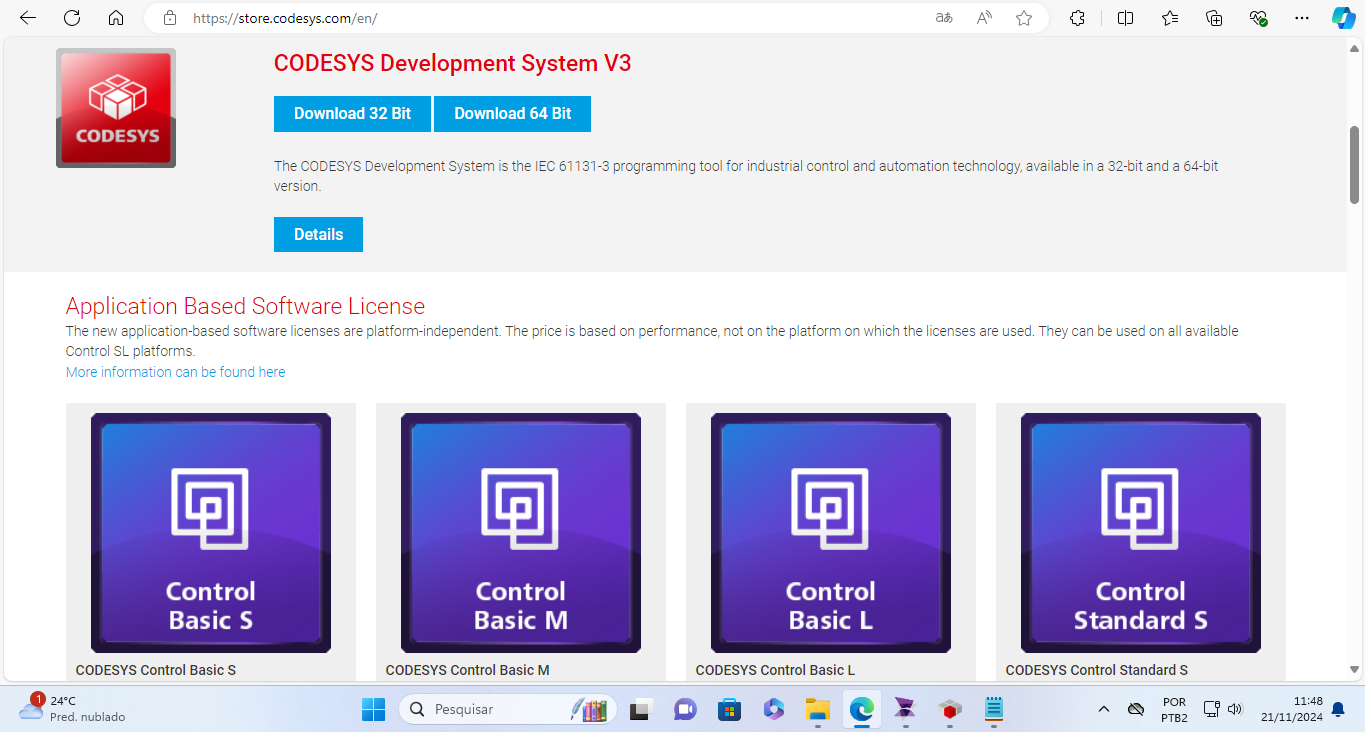
Note: It is necessary to have an account logged in to download the CODESYS Development System V3. The download does not require any payment.
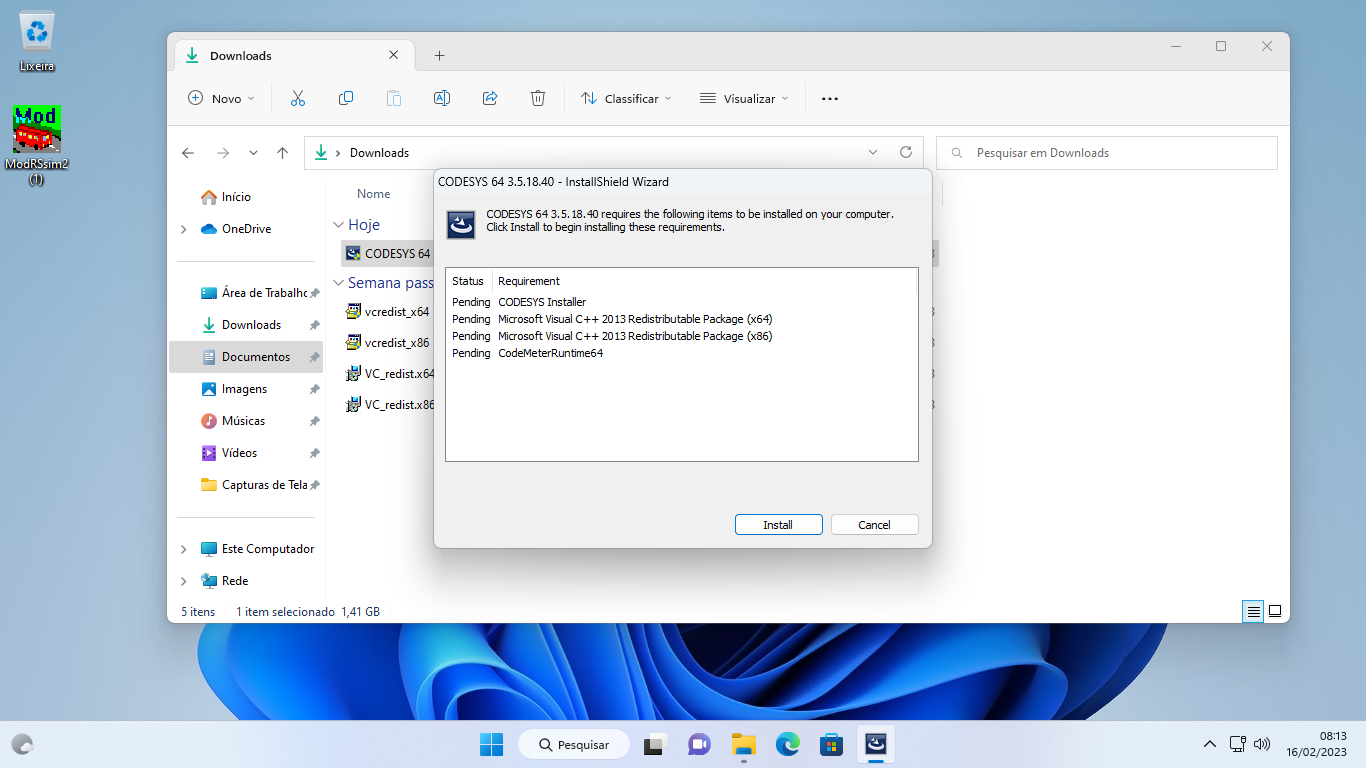
- Start the installation wizard and install all the requirements.
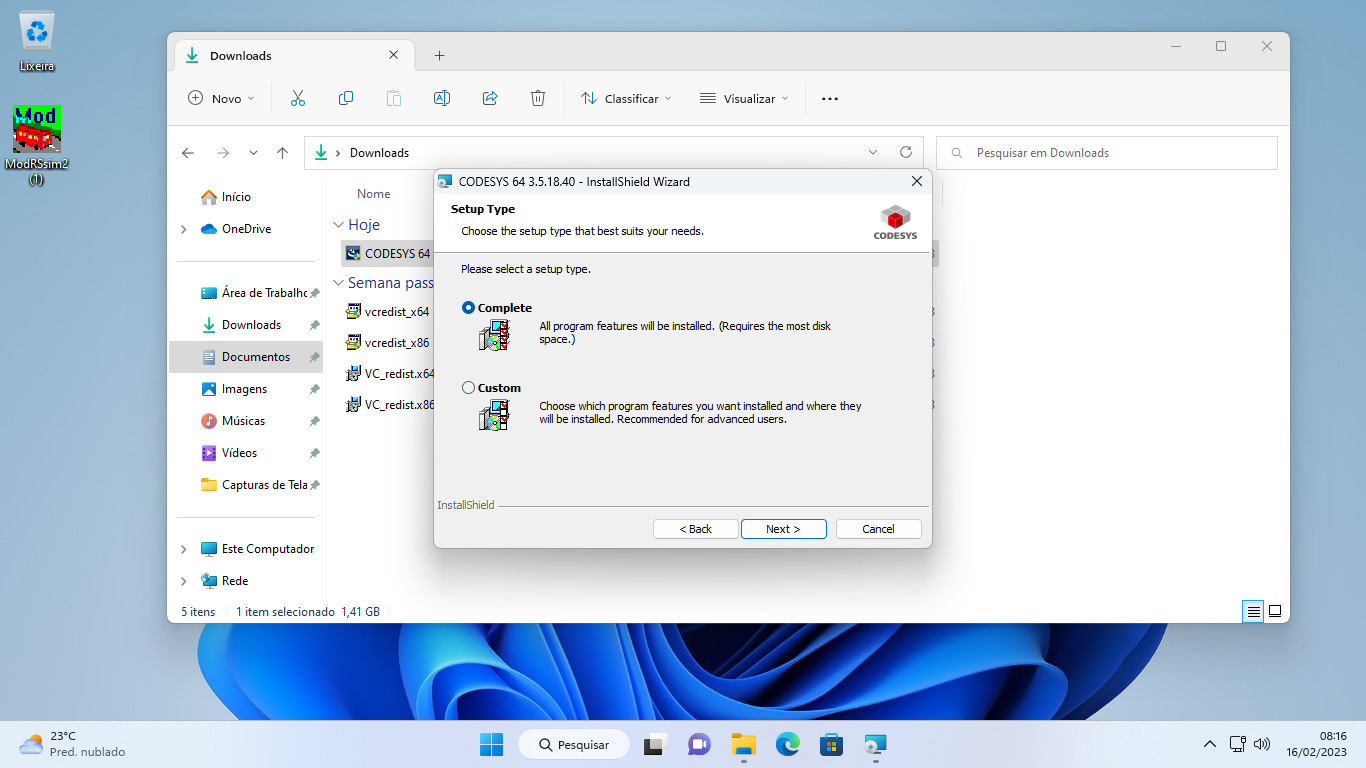
- After all the requirements are installed, the CODESYS installation will start. Select the complete installation option.
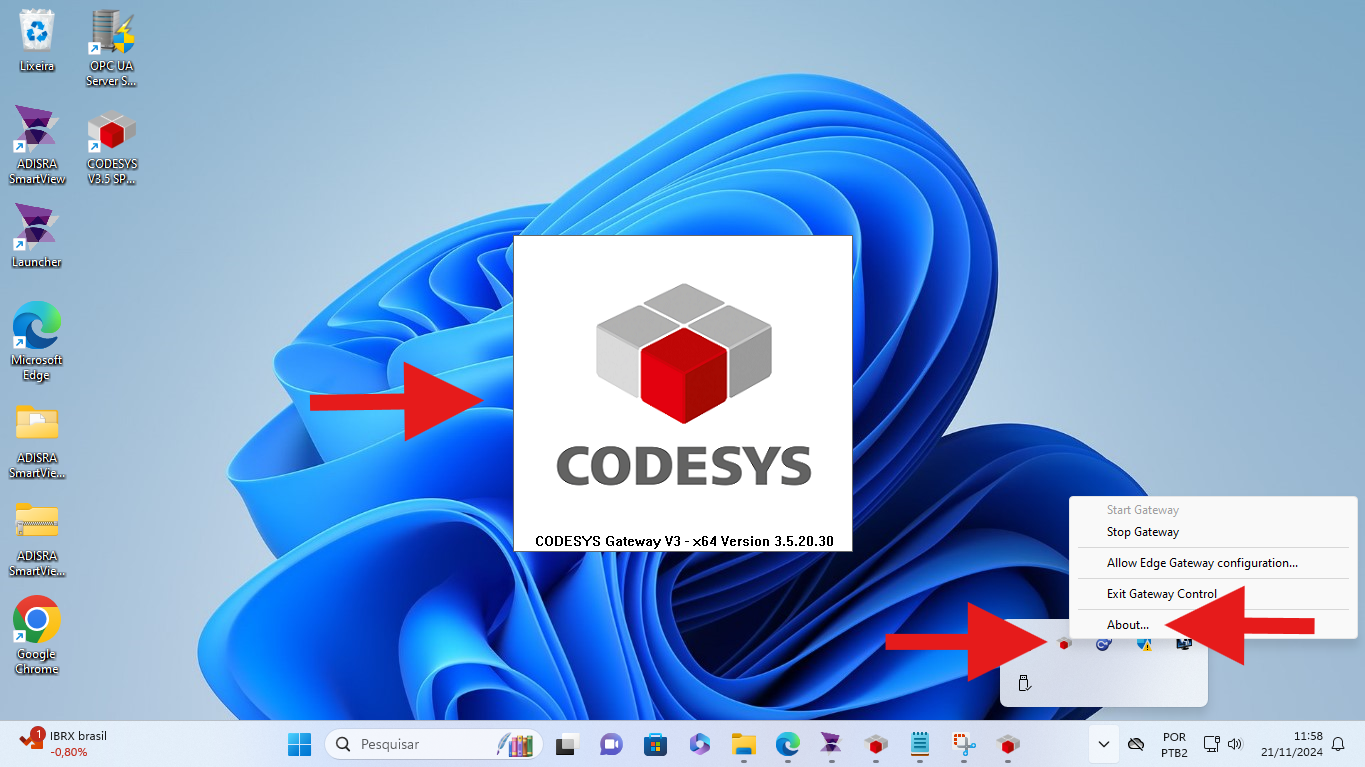
- Once installed, check your desktop notification tray and two new icons will be displayed. One is the icon CODESYS Gateway that operates the communication between the software and the PLC and the other one is the PLC icon.
- Right click the PLC icon and select the about option to see the version of PLC. This version will be needed when creating a new project.
2. Creating a New Project in Codesys
- Open CODESYS.
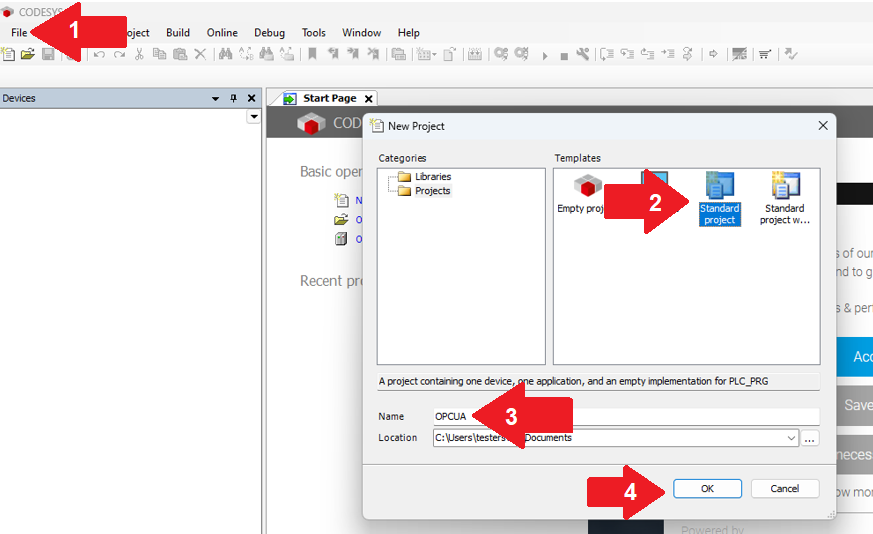
- Create a new project (File -> New Project): Select Standard Project.
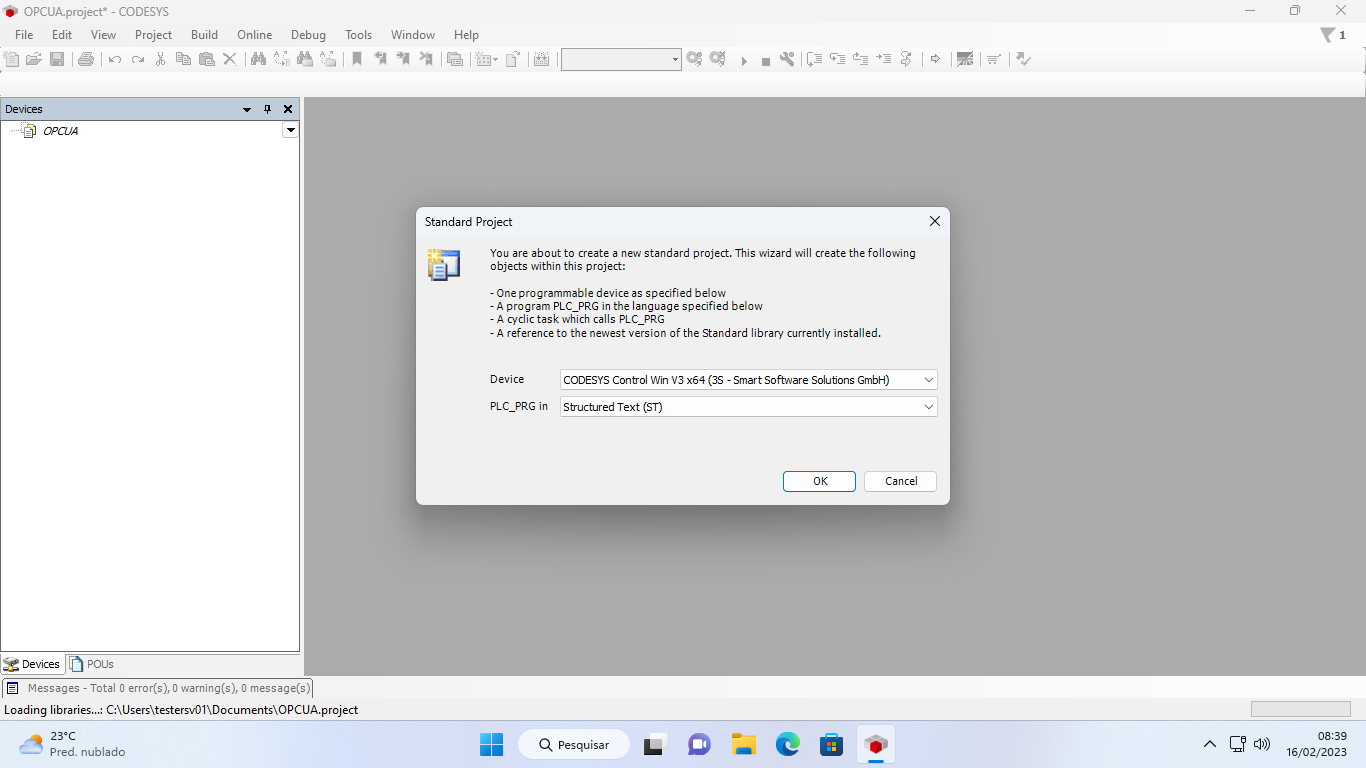
- In the Device option, select the CODESYS COntrol Win V3 X64 (that is, the same version that appeared in the windows icon tray). In the PLC_RPG option, keep it as Structured Text.
2. Creating variables in the project
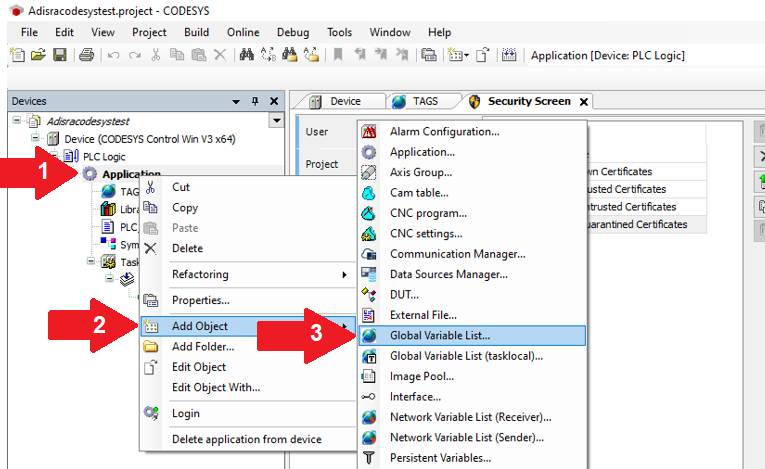
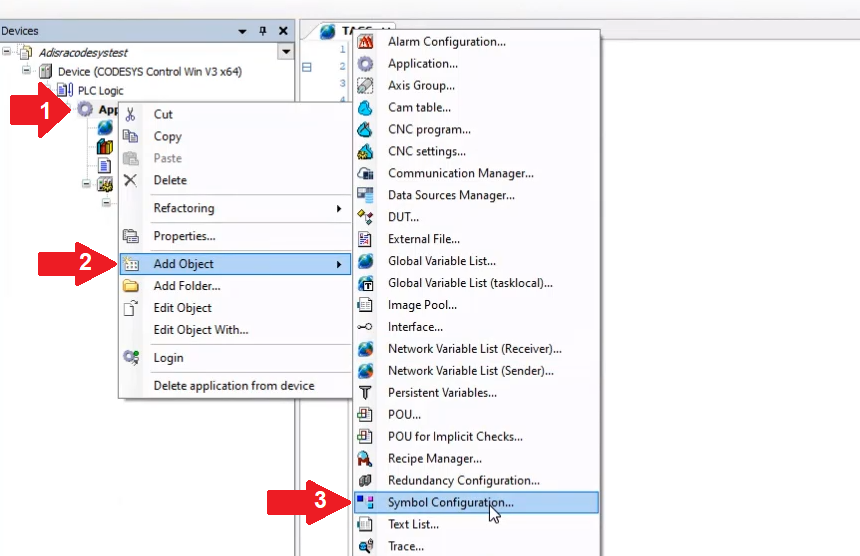
- In the navigation tree, right-click Application->Add Object->Global Variable List…
- Name this object “TAGS” and click OK.
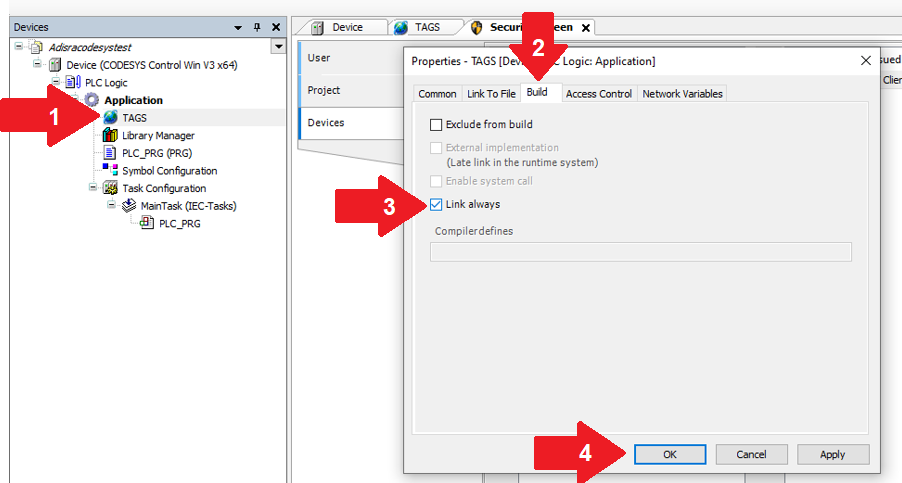
- Right-click on the created TAGS object and click on properties.
- On the Build tab, check the “Always Link” option.
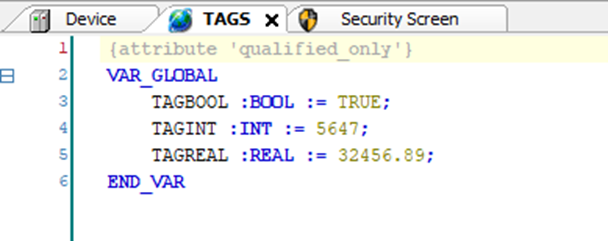
- Double-click on the TAGS object to open the code area. Then insert some tags which will be read by SmartView. Below is an example of declaring some tags.
- After creating the tags, right click on Application->Add Object->Symbol Configuration
3. Starting the PLC communication
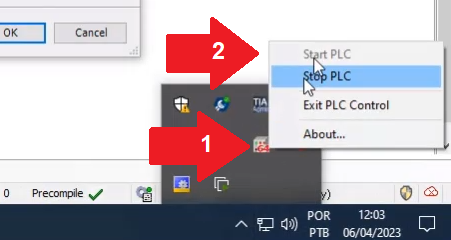
- In the icon tray, right-click on the Codesys icon and check if the PLC is in the “Started” option.
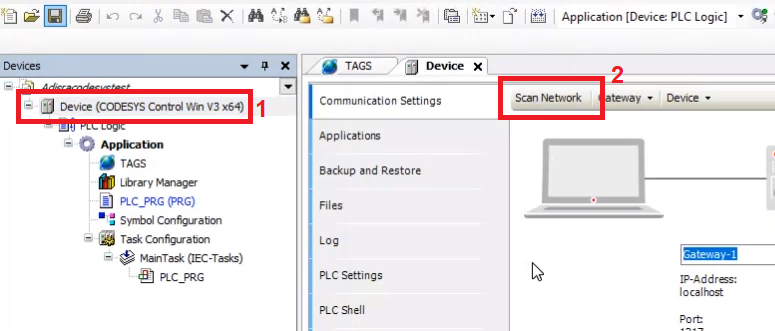
- Double click the device node in the navigation tree to open the device menu.
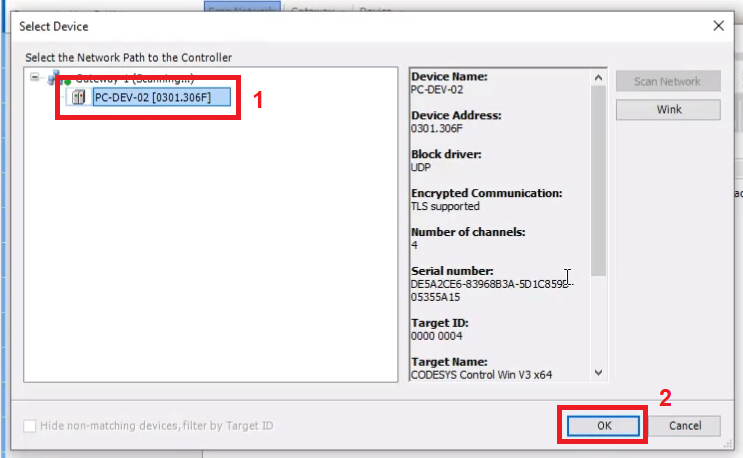
- With the device menu open, click on the communication setting tab on the left, click on Scan Network and select your machine’s PLC. Then, click on OK.
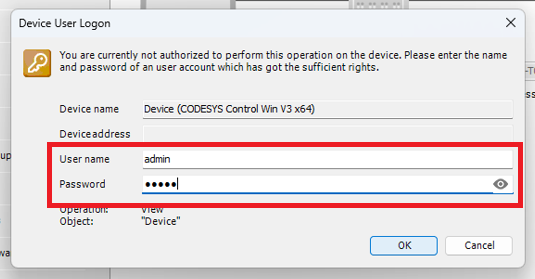
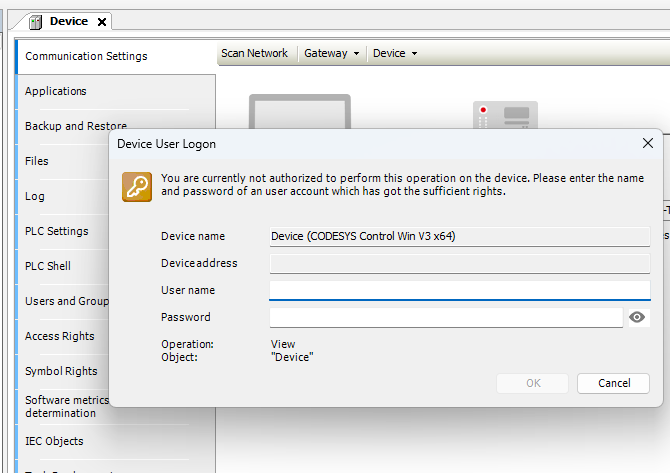
- A window will appear indicating it is necessary to create a user account to access the PLC. Create the account (username and password) and connect with it.
4. OPC UA Security Settings
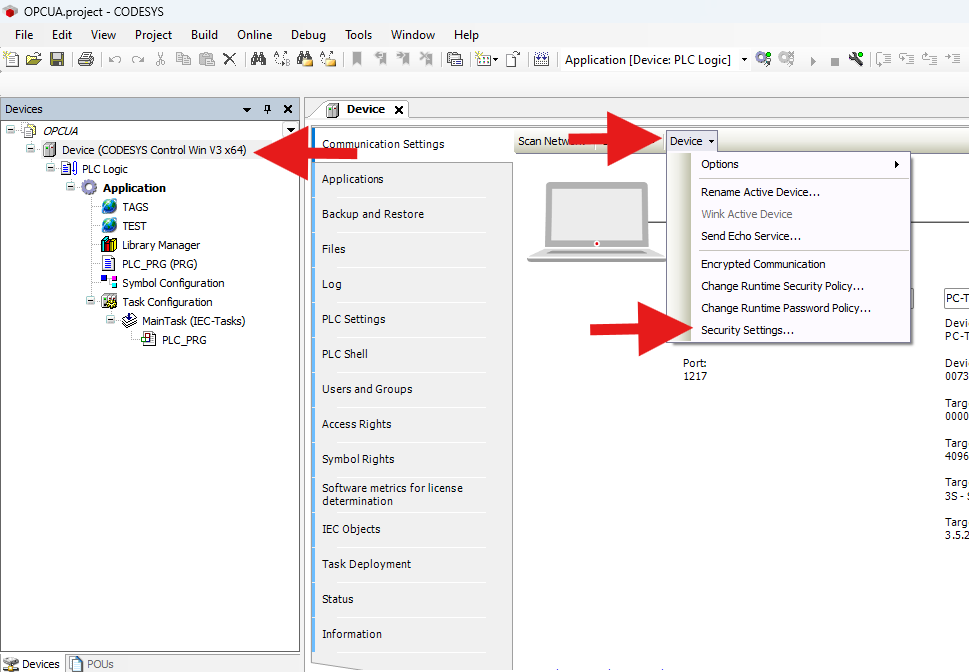
- In the navigation tree, right-click on “Device” and then on “Device”-> “Security Settings…”. It will be necessary to log in by entering your username and password.
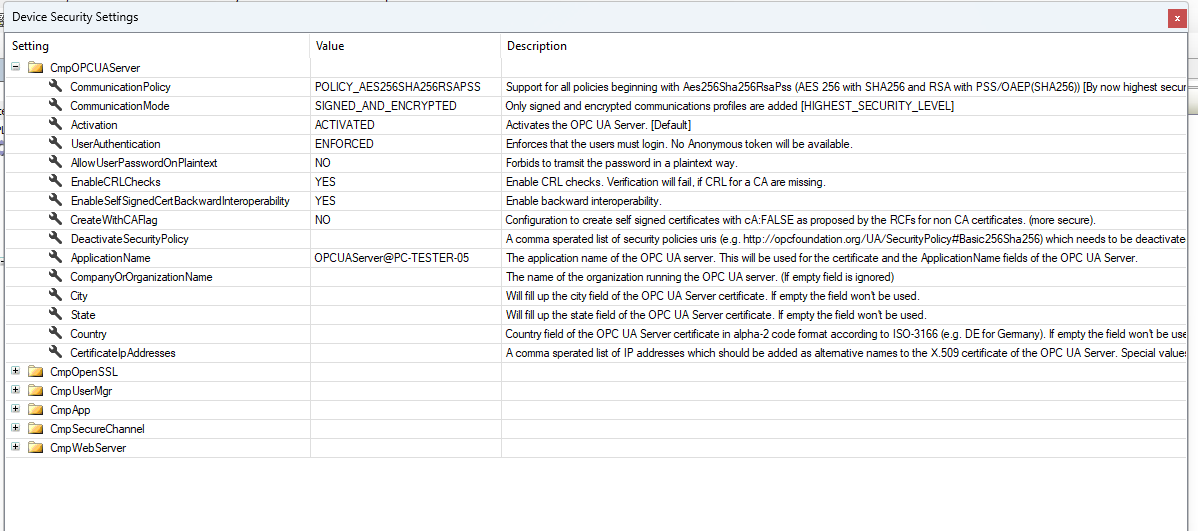
- A new window will be shown. This window contains the OPC-UA protocol security settings. Change the OPC UA security settings bellow by expanding the option CmpOPCUAServer.
5. Generating OPC UA Server certificates
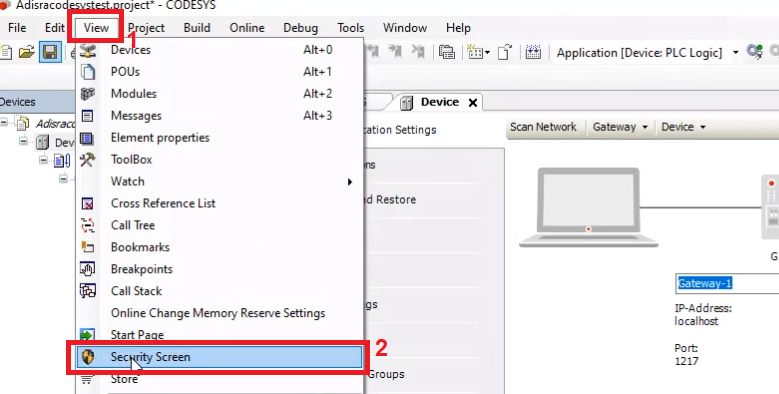
- With the device connected, in the main menu bar, click on the “View” tab and then on “Security Screen”.
- Then click on the Devices option and click on each step shown below to generate a new certificate.
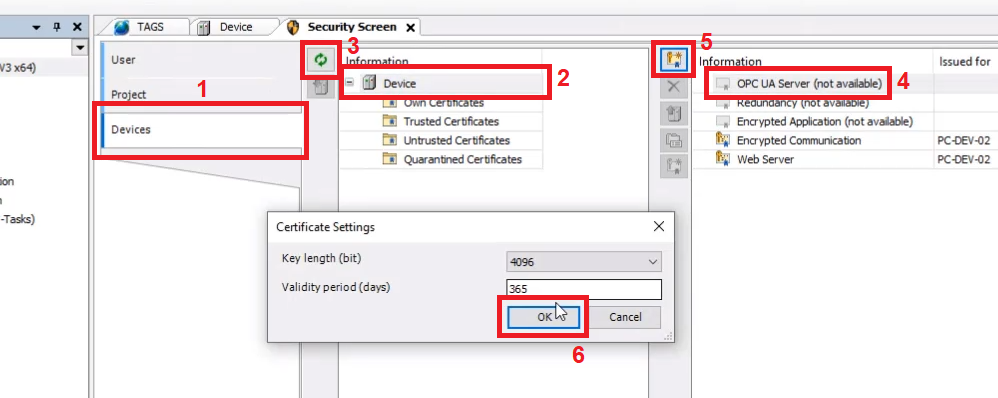
- A new certificate has been generated!

6. Download the project to the PLC
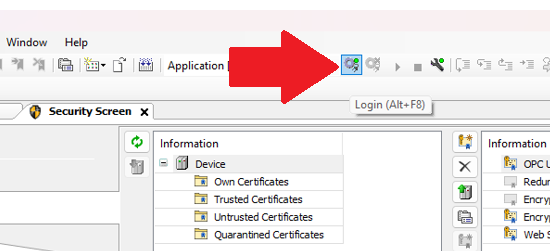
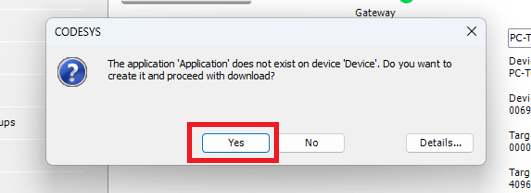
- After doing all the above settings, save the project and click the PLC login button and confirm the download. If after confirmation a new window appears asking for a password, enter the same user and password previously created when connecting to the PLC.
- Click “Yes”.
6. Connecting to SmartView
- Now, open ADISRA SmartView, create a new project, create a new OPC-UA connection and fill in the fields with your project information, for example, IP where the PLC is, the default port for OPC UA Communication 4840, user and password previously created and the security definitions made previously, including selecting the option “Sign and Encript” and selecting “Aes256Sha256RsaPss” option.
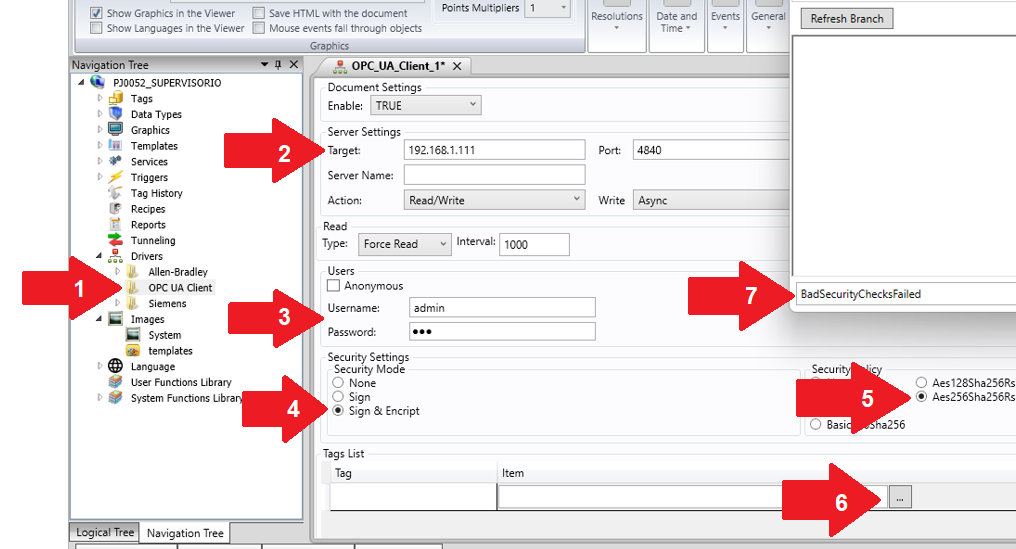
- After configuring, click the “…” button and a window will open. In the image below will show a “BadSecurityChecksFailed” error message. This message is shown because the certificate needs to be validated in COdesys. So go back to Codesys.
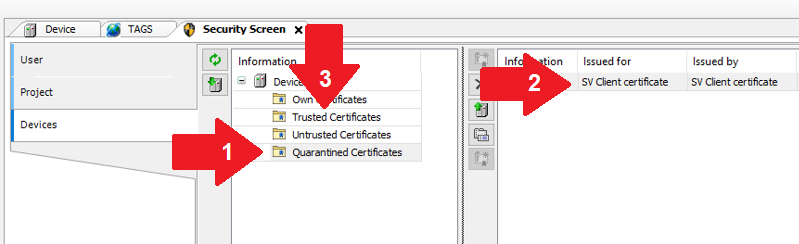
- Click on the “View” tab, and then click on the “Security View” option. Then, as per the steps shown below, click on the “Quarantined Certificates” folder. A new certificate will be shown. This certificate pertains to the OPC-UA communication between Codesys and ADISRA SmartView. Click and drag this new certificate into the “Trusted Certificates” folder. After that, click on the update button. Now the OPC-UA connection between Codesys and ADISRA SmartView is enabled.
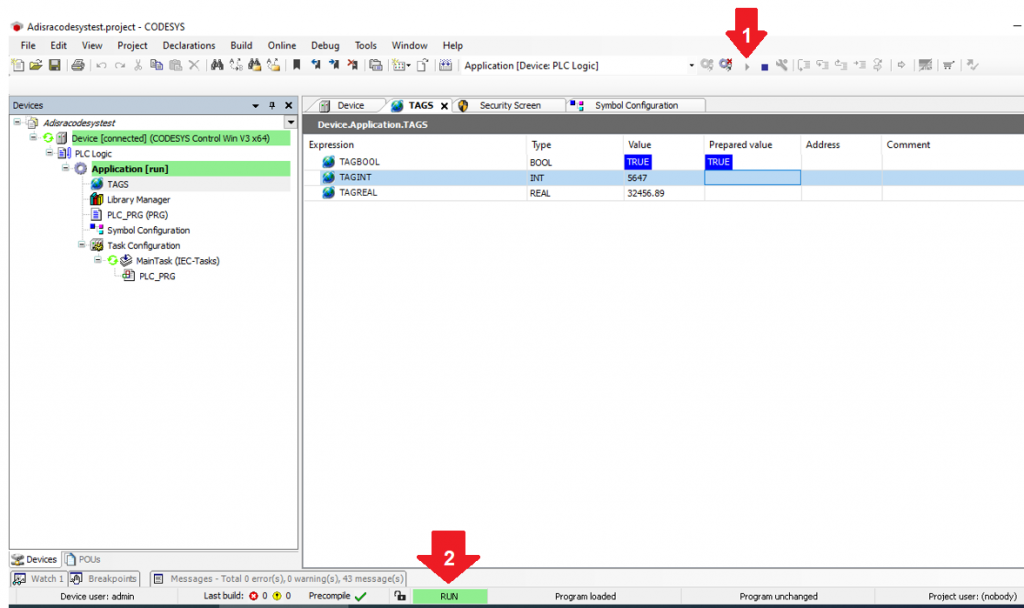
- Run the PLC as shown below.
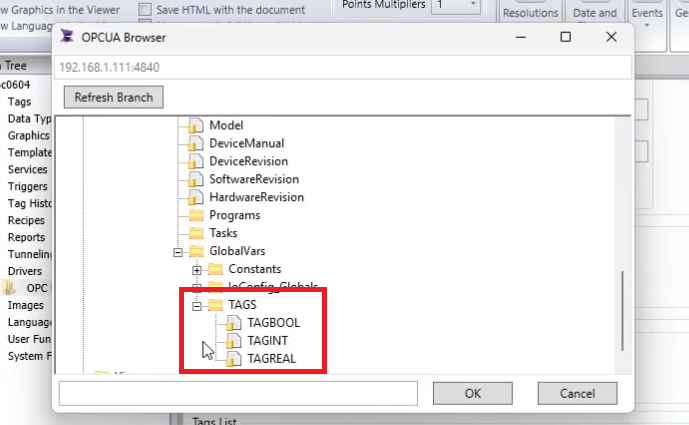
- Return to the ADISRA SmartView engineering environment, click the “…” button again to open the OPC-UA browser. Find available tags.