How the Security and Users System works
Purpose of this article
This article aims to explain how the ADISRA SmartView security and user system works. Therefore, in this article it will be discussed how to enable the security system in runtime and engineering mode, define initial user, configuration and user and user profile, define password rules, define local privileges, Audit Trail and security template.
Security and Users
ADISRA SmartView allows the developer to create a mechanism to manage the access level of users in RunTime mode and Engineering mode.
In Engineering Mode, you can secure access to the development environment by creating an access password.
In Runtime Mode, it is possible to configure privileges for users or profiles, such as allowing clicking on a button, starting or stopping an application, opening the task manager, keyboard shortcuts and others.
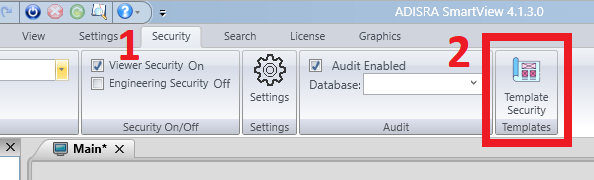
The security system is located in the “Security” tab.
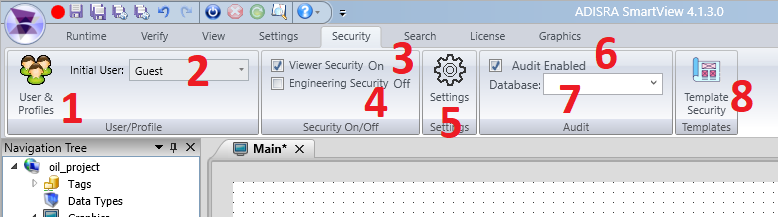
The Security Menu has the following features:
1- Open the User settings and Profiles
2- Sets the initial user of RunTime Mode
3- Enable or disable the Viewer Mode Security System
4- Enables or disables the Engineering Mode security system
5- Open Viewer Security and Password settings
6- Enables or disables the Audit Trail
7- Field to select in which external database the Audit Trail electronic records will be stored
8- Open the Templates Security settings, that is, it is possible to enter a password to access a template developed in the application.
Enabling Viewer Mode Security
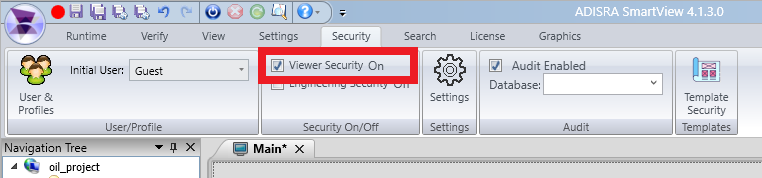
To enable viewer security mode, access the “Security” menu and then select the “Viewer Security On” option. By default, this option is enabled. Once enabled, any user action in viewer mode will depend on the privileges granted in the “Users & Profiles” settings.
Enabling Engineering Mode Security
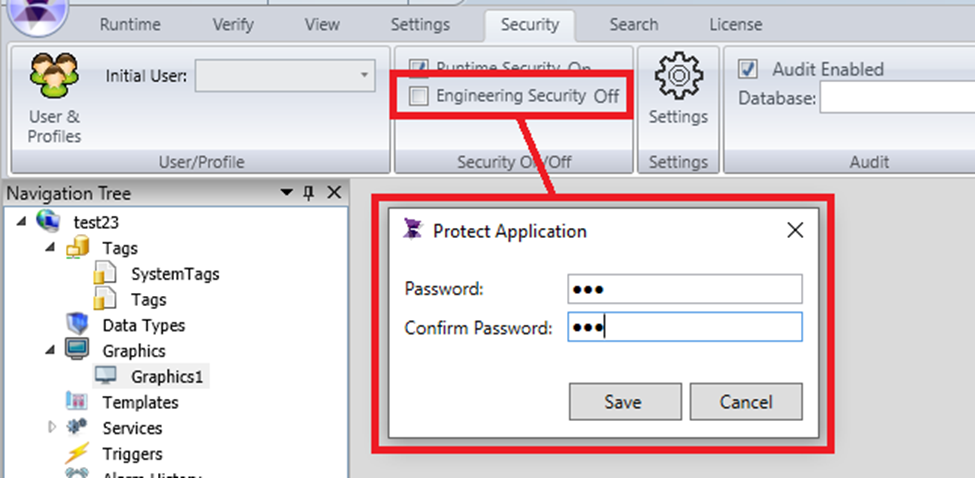
To enable Engineering security mode, access the “Security” menu and then select the “Engineering Security Off” option. By default, this option is disabled. Once enabled, it is necessary to set a password to access the engineering environment. In this way, whenever the engineering environment is opened, a password will be requested, ensuring that only people with the password have access.
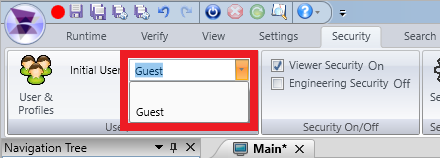
Defining Initial User
To define an initial user, access the “Security” menu, then in the “Initial User” option, select the user in which to start in RunTime mode. By default, no user is defined. Whenever a new user is added in the “Users & Profiles” settings, it will be available in the checkbox.
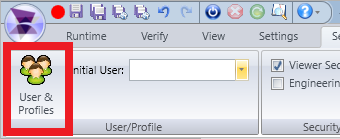
Configuring Users and User Profile
To access the user and user profile settings, in the “Security” menu, click on the “User & Profiles” option.
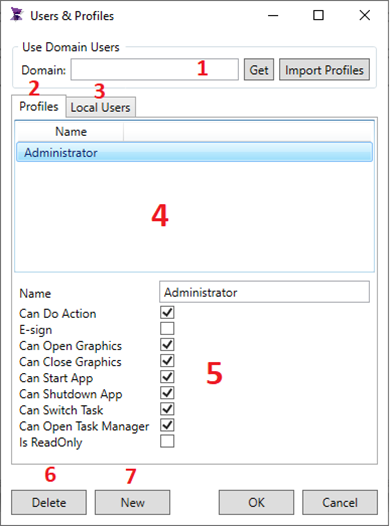
A configuration window will open containing the following properties:
- Allows using Windows user settings;
- Tab which shows all the “Profiles” of users;
- Tab which shows all the “Users”;
- Shows all “Profiles” or users of the application;
- Options to enable or disable privileges for the “Profile” or the user selected above;
- Deletes the selected “Profile” or “User”;
- Create a new “Profile” or “User”, depending on the tab open.
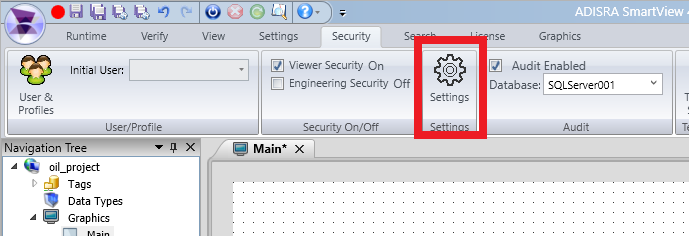
Configuring Viewers Security and Password Rules
To access the Viewer Settings and password rules, in the “Security” menu, click on the “Settings” option.

A configuration window will open containing the following properties:
- If enabled, Automatic user logoff after X minutes.
- If enabled, blocks User Login for X Minutes after X failed attempts;
- If enabled, Automatic user logoff after X electronic signature errors;
- Define password rules, such as uppercase and lowercase letters, numbers, special characters and minimum characters in user passwords;
- Define password rules, such as expires in X days, user will need to change the password on the first login and it is not allowed to repeat the last X passwords used previously.
Setting Privileges Directly on Graphic Objects
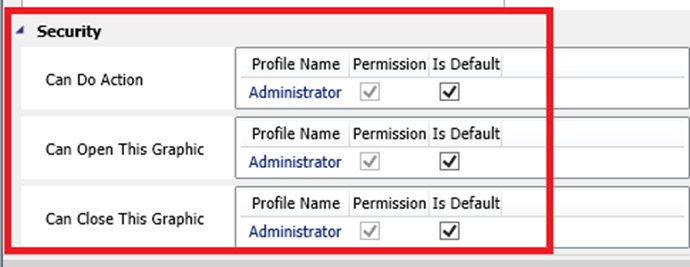
It is also possible to set a profile’s privilege level directly on screen objects. In the property list of an object, for example a screen, there is a property called “Security” which allows setting privileges for the actions of “Can Do Action”, “Can Open This Graphic” and “Can Close This Graphic”. By default, the “Is Default” option is selected. According to the image below, the privilege level will respect the privileges defined in the User Settings and User Profiles window.
Audit Trail
The Audit trail Feature is a detailed chronological record of all user actions in the application. Audit Trail is widely requested by food and pharmaceutical industries to ensure that all user actions are tracked.
This feature was developed to comply with FDA 21 CFR Part 11 regulations of the Food and Drug Administration (FDA), which sets out the criteria under which the agency considers electronic records and electronic signatures to be reliable, being equivalent to handwritten paper records and signatures.
An Electronic Record is any data that can be saved electronically and retrieved later.
An Electronic Signature is a specific type of Electronic Record that contains the following information:
– Timestamp;
– User name;
– Meaning of the signature.
SCADA software cannot claim to conform to the standard. The software must provide the necessary tools to allow a developer to create an application that is FDA 21 CFR Part 11 compliant.
SCADA does not “force” the developer to build a standard-compliant application. Compliance is optional during application development.
Therefore, to meet the requirements of FDA Standard 21 CFR Part 11, ADSIRA SmartView has the following functionalities:
- Controlled access to SCADA application: All users of the SCADA system can be properly registered with unique and personal passwords. Therefore, these users will be authentic and responsible for their actions within the system;
- No one (not even the system administrator) has access to any user’s password;
- Automatic user logoff: this functionality protects the system by blocking access to it if the user is not present, because in this way no other person could impersonate the last user who logged in without having logged off properly;
- Records of occurrences in Audit Trail: critical actions within the SCADA system such as initialization, termination, change of equipment setpoint, generation of reports among others are recorded in a Database
- Visualization of Audit Trail in RunTime Mode;
- Database connectivity (SQL Server, Oracle, Microsoft Access and etc).
Note: The standard does not mention whether electronic records must be stored in a standard database or in a proprietary format.
Configuring Audit Trail
The following will show you how to configure the Audit Trail feature in an application where a user needs to open or close a valve. Every action on valve control will be recorded by electronic signature.
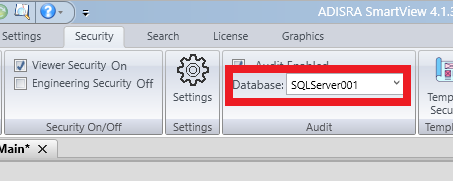
- Open the security tab and in the Database field, select the external database in which the electronic records will be stored.
Note: Audit trail can only be stored in an external database.
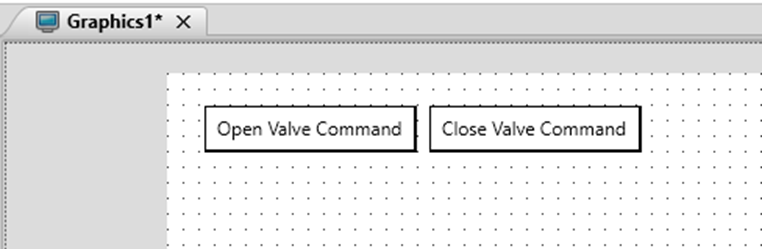
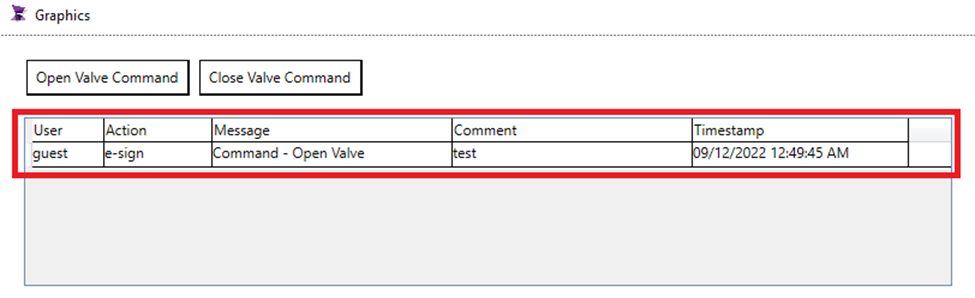
- Create a screen and insert two buttons according to the image below.
- In the mouse down event of each button, add a script to change the status of a tag, which will represent the status of the valve.
- Select the “Open Valve Command” button and in the properties list, enable the E-Signature option and below enter the text in which it will be registered when the electronic signature is signed in runtime mode by a user.
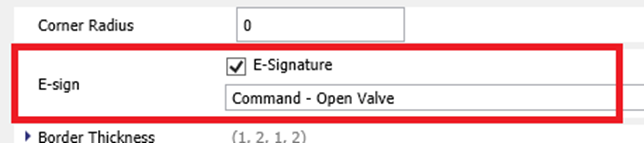
- Repeat the same settings for the Close Valve Command button.
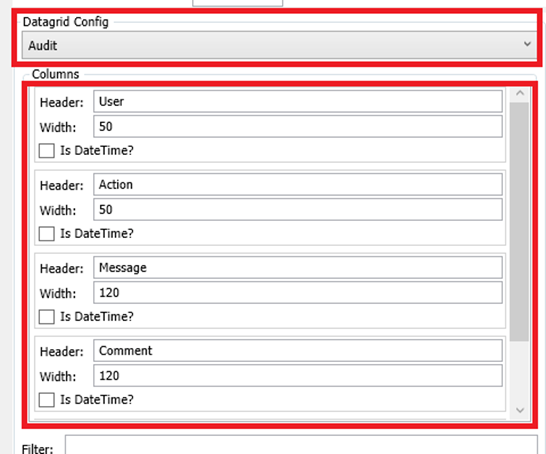
In the list of properties of the DataGrid object, it is possible to notice that by default the query will be in the Audit Trail table, located in the external database. By default, the table consists of the following columns:
- User: Shows the name of the user who made the electronic signature.
- Action: Whether the electronic signature was successful or failure occurred.
- Optional message which can be made by the user at the time of electronic signature.
- Timestamp: Date and time of the time of the electronic signature.
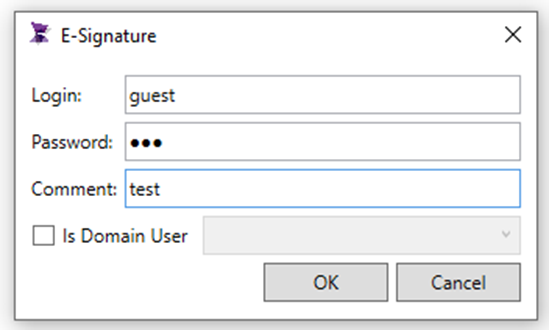
- Now, start Runtime mode with the initial user who has permission to make electronic signatures and click the Open Valve button. A confirmation window will ask for some information, such as:
- Login: Username in which the electronic signature will be made.
- Password: of the user to which the electronic signature will be made.
- Comment: Optional comment which will be recorded in the Audit Trail table.
- Is Domain User: Select the option if the user is from a local windows domain.
- Electronic signature successful. Therefore, from this resource, it is possible to request an electronic signature from a user for any action in the application.
Template Security
Template Security allows the user to protect documents of the “Template” type. When a template document is created, it can be used in various applications using the “Export” and “Import” functions.
However, if necessary, the developer can restrict access to the template by associating the Hardkey or Softkey license serial number.
The Template Security Feature can be found by accessing the Security menu then the Template Security option.
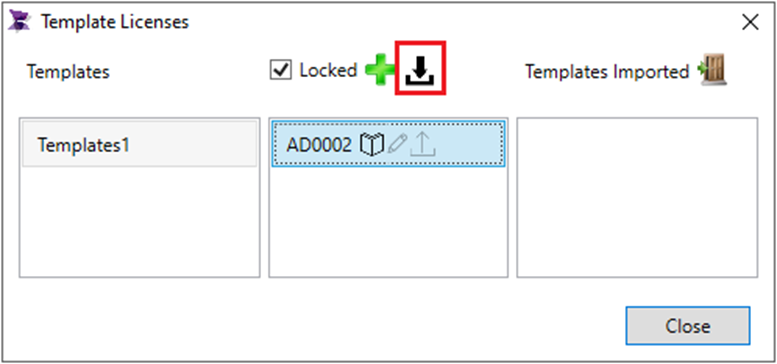
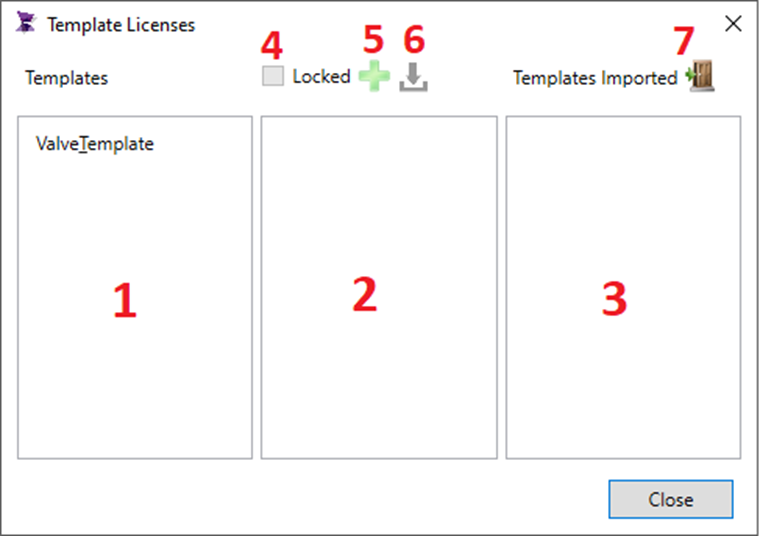
The Template Security feature settings window is organized as follows:
1- Shows the templates available in the application;
2- It shows the serial number of each license (Softkey or Hardkey) in which you have permission to use;
3- Shows the templates available for the active ADISRA SmartView license;
4- After selecting the Template in the first area, the “Locked” option will be available to enable protection;
5- Opens a window to insert the license in which you will be allowed to use the selected template;
6- Generate the “TemplateLicense.Lic” file. This file contains all the licenses that will be allowed to access the protected template.
7- Import the “TemplateLicense.Lic” file.
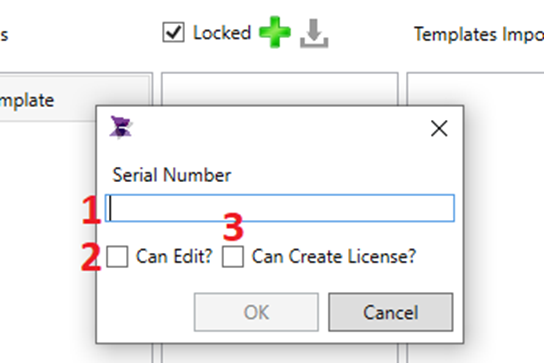
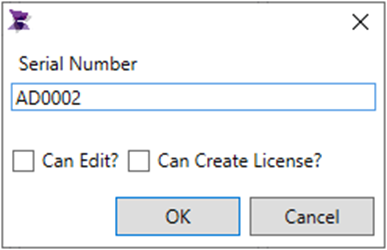
The window for adding licenses has the following fields:
1- Field to insert the serial number in which you will have access to the selected Template;
2- If enabled, the above license will be able to edit the template;
3- If enabled, the license above can insert new licenses.
Configuring Template Security
The process to configure the protection of a template document follows the following steps:
- Create a template document in which it will be protected;
- Export the Template Document;
- Access the Template Security feature, and define which licenses (SoftKey or Hardkey) can have access;
- Generate the “TemplateLicense.lic” file;
- With the two files generated, send these files to the developers where they can access the template;
- Import the template document;
- Import the “TemplateLicense.lic” file to allow access to the imported template.
Below is an example of how to protect a template.
- Create a document containing only one textbox object and then save it.

- Then, open the “Settings” menu then click on the “Template Security” button.

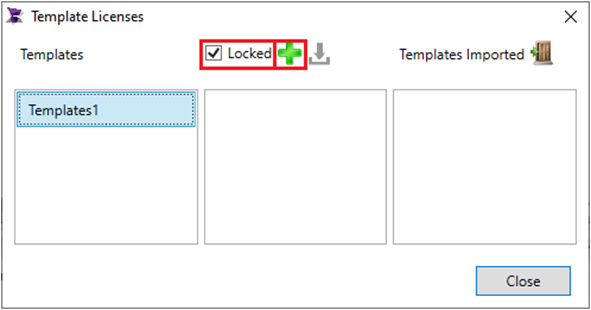
- Select the “Template1”, which we want to protect and then enable the “Locked” option and click the “+” button.
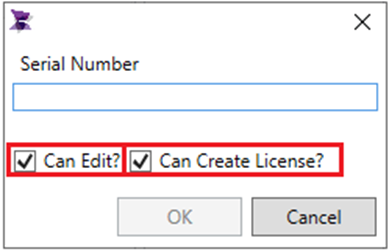
- For our example, keep the “Can Edit?” options disabled. and “Can Create License?”, that is, after disabled, the license with permission will not be able to edit the template or allow new licenses to be inserted. Therefore, this license can only use the template in Runtime mode.
- Enter the serial number in which you will have permission to use.
- To find the serial number, open the ADISRA SmartView on the machine that you want to give permission, and select the license ribbon:

- For this license we only gave the permission to open/use the template.
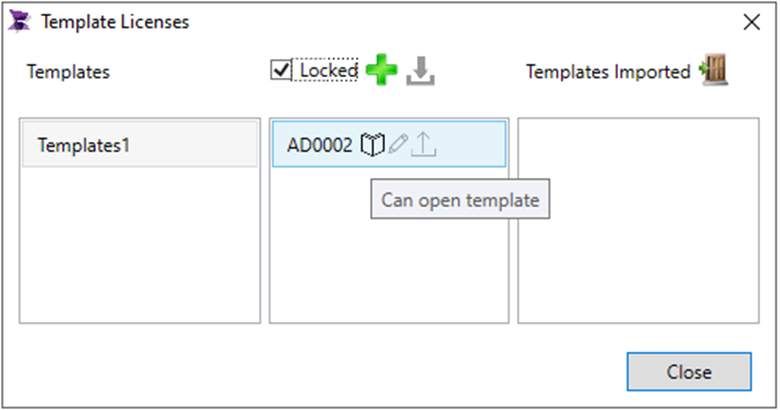
- Now that we’ve created the permissions, we need to generate the license file for the serial number that we gave permission, in our example the “AD0002”. Select the desired serial number and click button right next to the “+” button, it will open the window to select the name and location of the file: