Creating Templates
Templates are created similar to a new Graphics, the user will add objects to the Template document and save it as a new object. As explained in the Overview, the Templates can have internal tags which is what makes them generic and reusable.
Follow the steps below to create a simple Template with internal tags from scratch, add it to a Graphic screen, execute the application and check the final result.
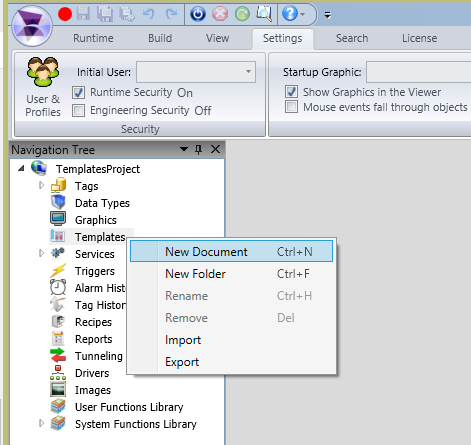
1. New Template
The first step is to create a new Template document. It can be done by right clicking the Templates node in the project and selecting “New Document”. The Templates can be organized into folders if needed.
A new Template is created and all the Graphic objects are available on the Graphics Ribbon to be included into this new Template. There are important features in the Template area and the Property Grid. The Template area can receive any graphic object available in the Top Ribbon and the Property Grid allows configuring Object Tags (similar to the Screen Tags). The Object Tags feature allows the templates to be generic since they are not actually Application Tags.
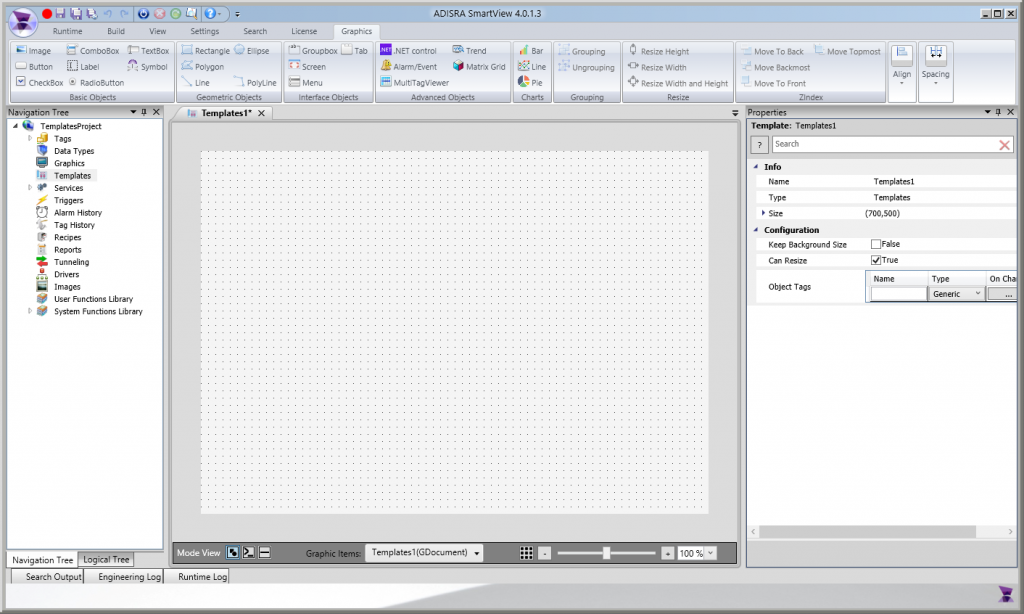
2. Adding objects to the Template
Now that we have created an empty Template, let’s move forward a few steps to create the Template interface.
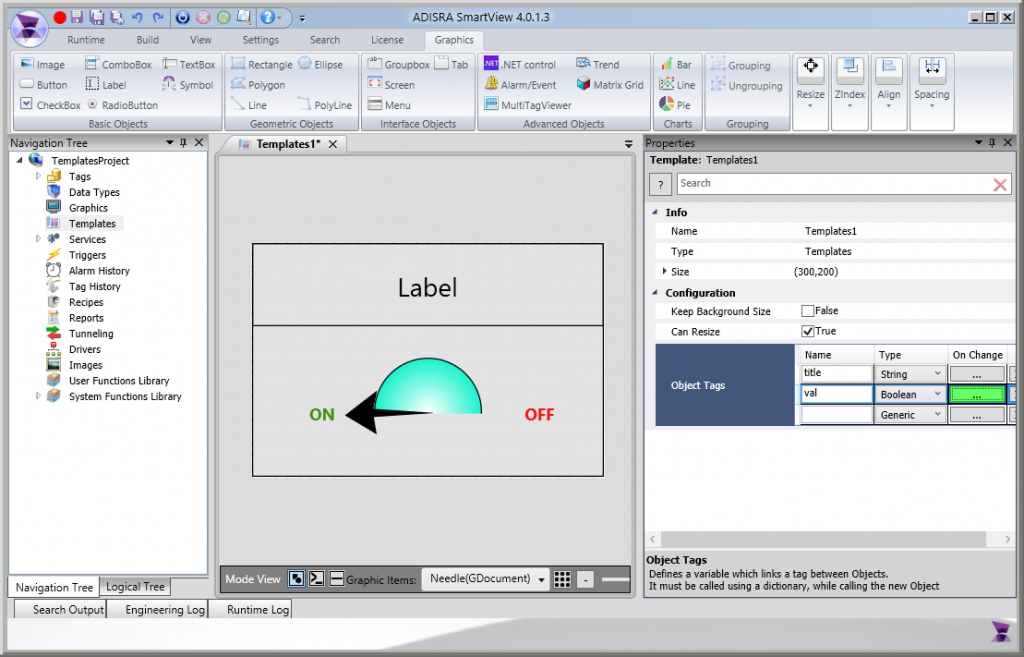
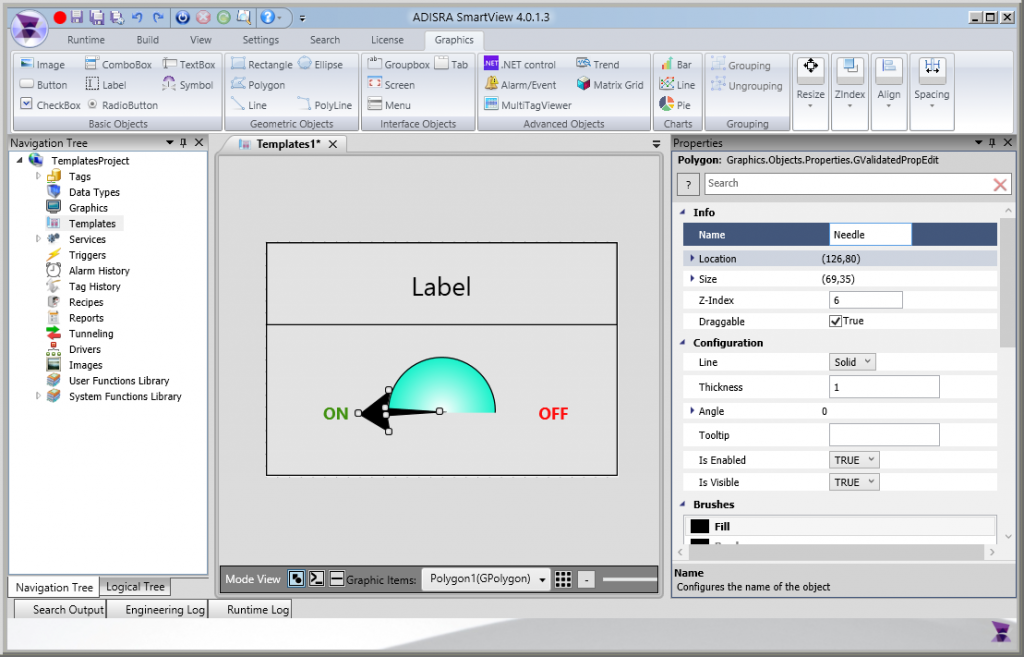
The image below shows the Template’s user interface. This template is an animated boolean gauge to display whether a tag is true or false. It will also display a string Title which will be defined when the template is actually added to a screen.
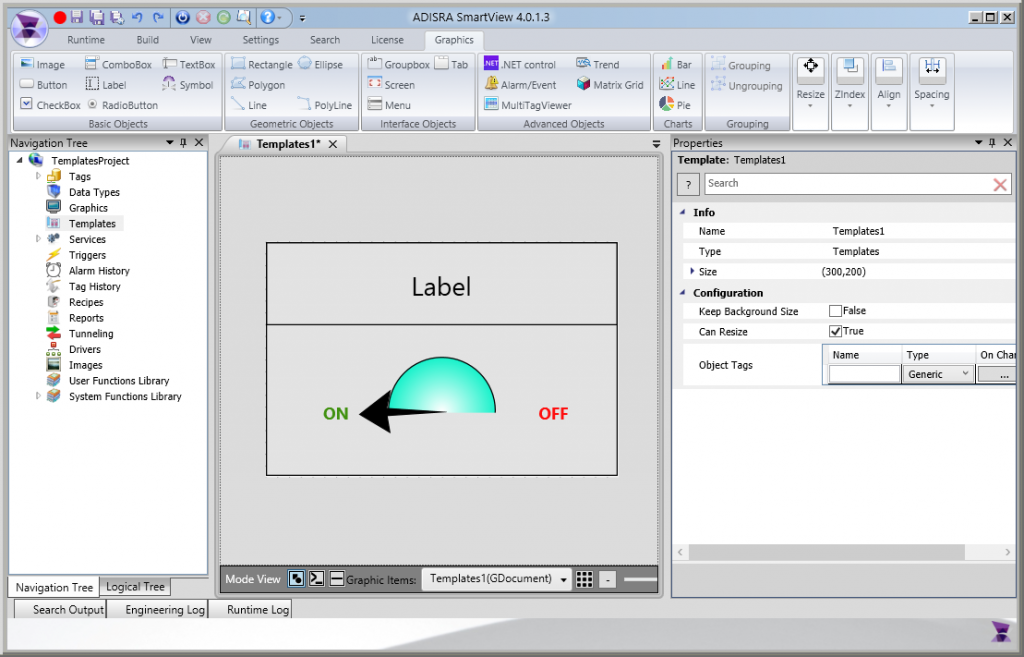
So far the Template doesn’t have any animation. It basically contains some rectangles, labels, a circle and a polygon drawn as an arrow. The arrow center marker was also moved to the center of the circle to allow it to rotate from ON label to OFF label while switching the Angle from 0 to 180.
Let’s give a better name for the Polygon since it will be used later. This can be done by selecting the object and changing the Name property to “Needle”.
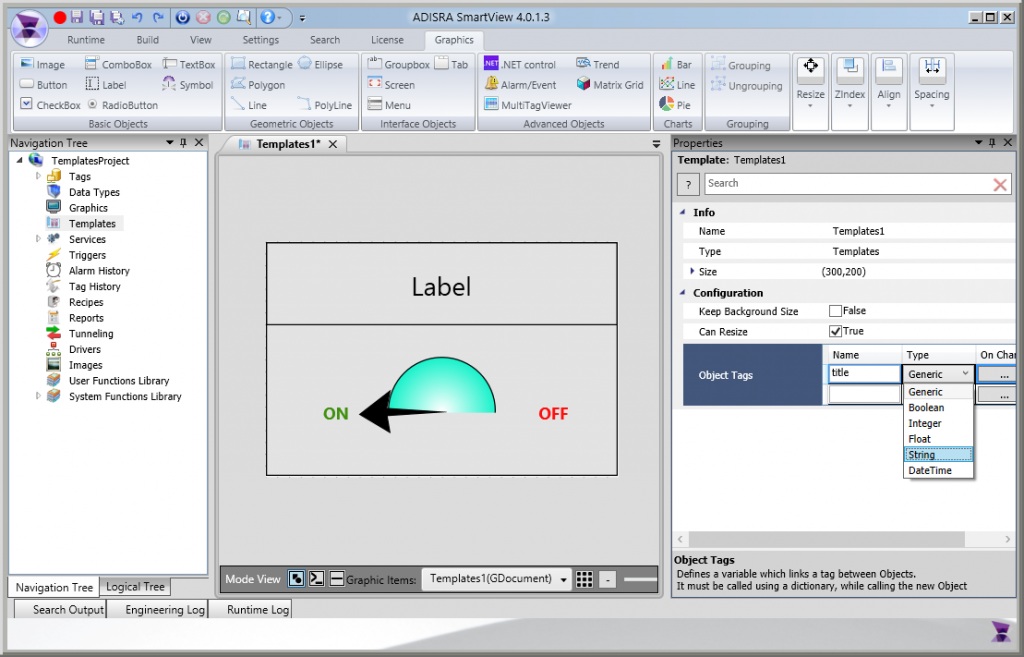
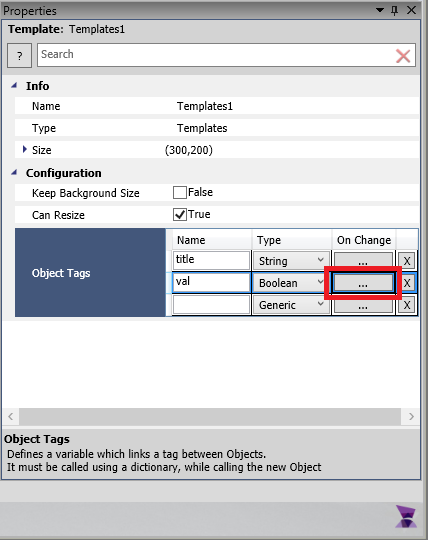
3. Adding Object Tags
The title of the Template will be a parameter and the animation we want to achieve will be done over the arrow angle and it will change according to a boolean value. We will need 2 Object Tags as shown in the image below
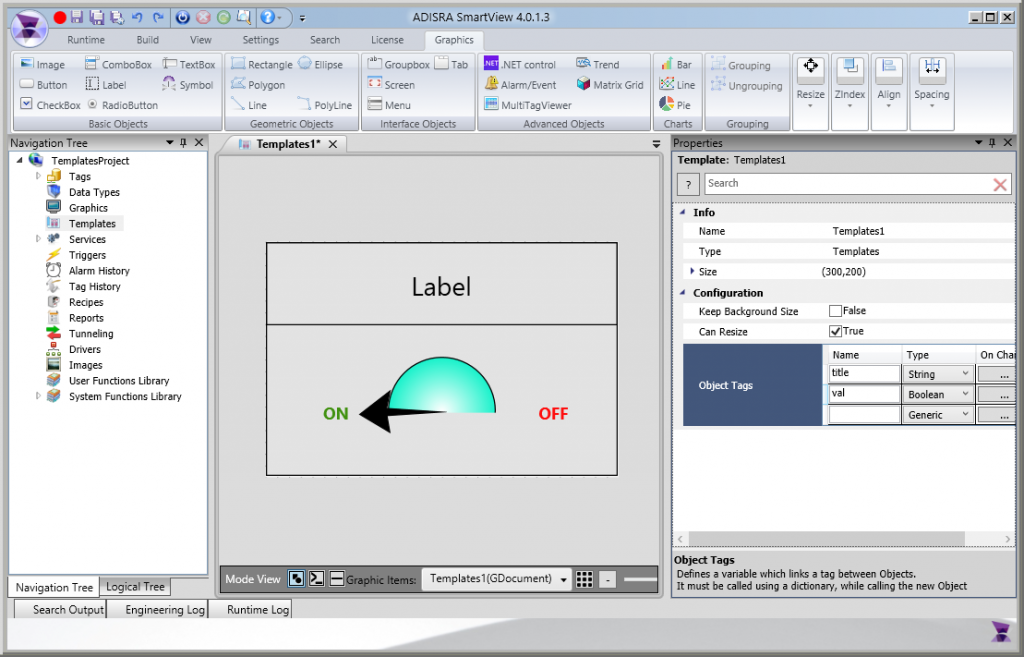
4. Using Object Tags
After creating the Object Tags, we can use them in the objects. The title Tag will be added to the Label on top and the val tag will be used to calculate the arrow angle.
The # token is used to assign an Object Tag. As soon as it is added to a script or to a field that accepts tags, ADISRA SmartView will display an auto complete with all the available Object Tags.
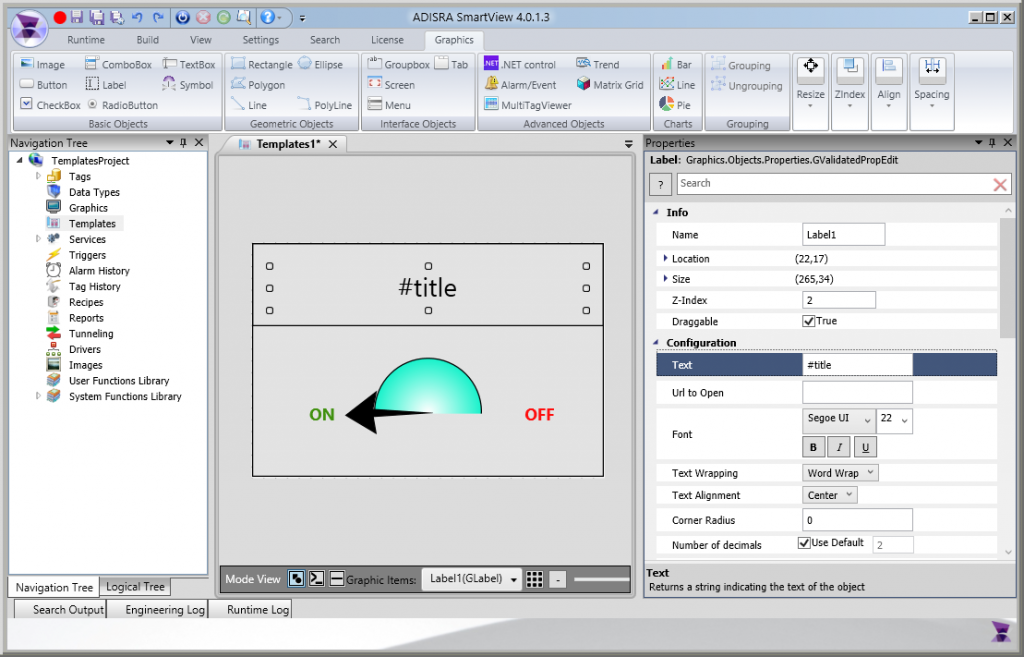
To animate the gauge, we will change the Polygon’s angle named “Needle” from 0 to 180 every time the #val tag changes value. The Object Tags allow scripts to be configured for that purpose. Please take a look at the image below.
The On Change script highlighted above will be executed everytime the tag changes value. The next step is to write a c# script to perform the animation. As soon as the On Change button is selected, the script box will be displayed
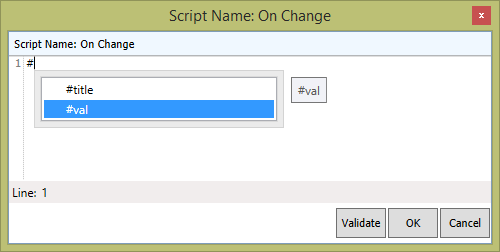
The # token displays the available Object Tags. If #val is true, the Needle angle is 0 otherwise it is 180. Please review the script below.
if (#val)
{
	Needle.Angle = 0;
}
else
{
	Needle.Angle = 180;
}
After confirming the script, the On Change button related to the #val tag turns green indicating there is a valid script. If there is an error, it turns red.